
Contacts and Call History
Below is a detailed explanation of the Contacts and Call History sections in the Ziwo Mobile App.
Contacts Section in the Ziwo Mobile App
The Contacts Section of the Ziwo Mobile App is designed to give you quick and easy access to all your contacts, enabling efficient communication with clients, customers, colleagues, or anyone else in your contact list. This section is integral to the functionality of the app, as it helps you initiate calls, manage contact information, and track communication history.
1. Accessing the Contacts Section
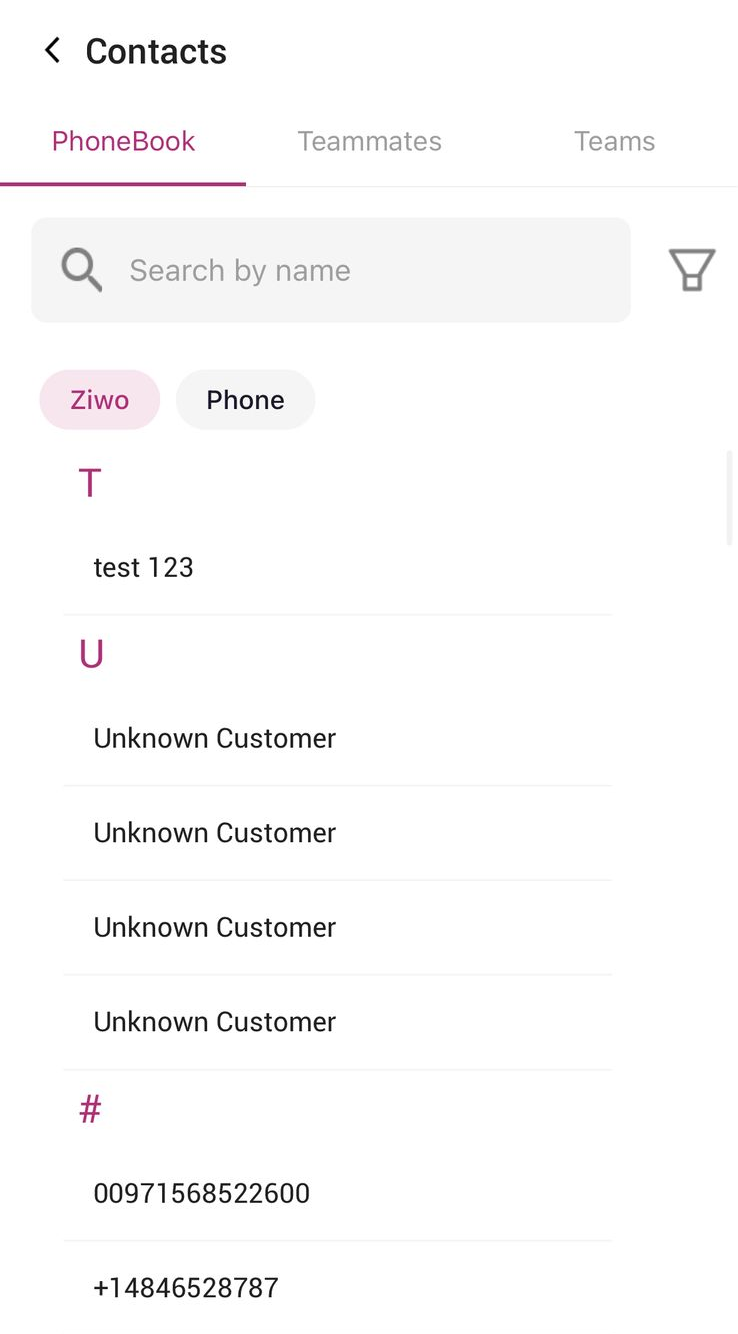
- Location: The Contacts section can typically be found on the Home Page or Main Dashboard of the app. It is often represented by a Contacts Icon or a button labeled "Contacts".
- Interface: Once you tap on the Contacts Section, you will see a list of all your contacts, either in alphabetical order or organized by groups (depending on the app’s configuration).
2. Features and Functions in the Contacts Section
Search Function
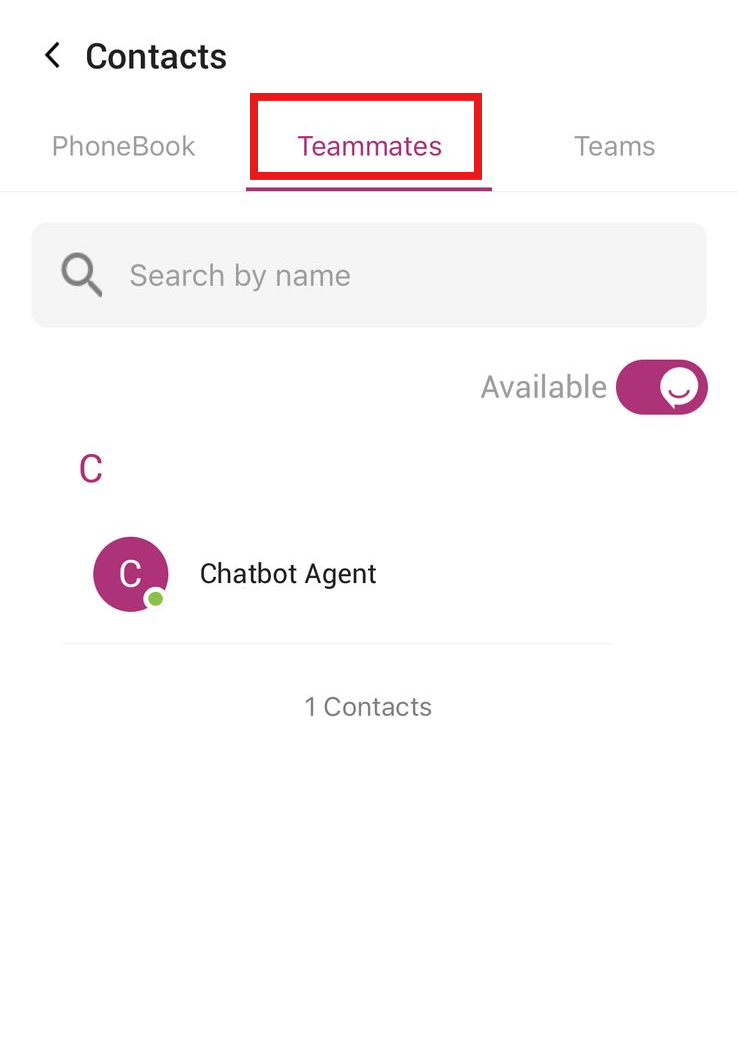
- Search Bar: At the top of the Contacts screen, there’s typically a search bar where you can quickly find a specific contact. Simply start typing a name, phone number, or company, and the app will automatically filter and display matching contacts.
- Auto-Suggestions: As you type, the app may provide auto-suggestions based on your contact list or recent interactions, making it faster to find and call someone.
Contact List
- Alphabetical Sorting: Your contacts are usually organized alphabetically by name or company, making it easy to browse through the list.
- Contact Details: Each contact entry will typically show key information such as:
- Name: The name of the contact.
- Phone Number: The contact’s associated phone number(s).
- Profile Picture: If the contact has a profile picture saved, it may appear next to their name.
- Additional Information: Depending on the app’s settings, the contact list may also display company details, job title, email, or other relevant information.
Contact Options
- Call Contact: Tapping on a contact’s name will allow you to directly dial them. The contact’s phone number will automatically populate the Dialpad, and you can press the Call Button to start the conversation.
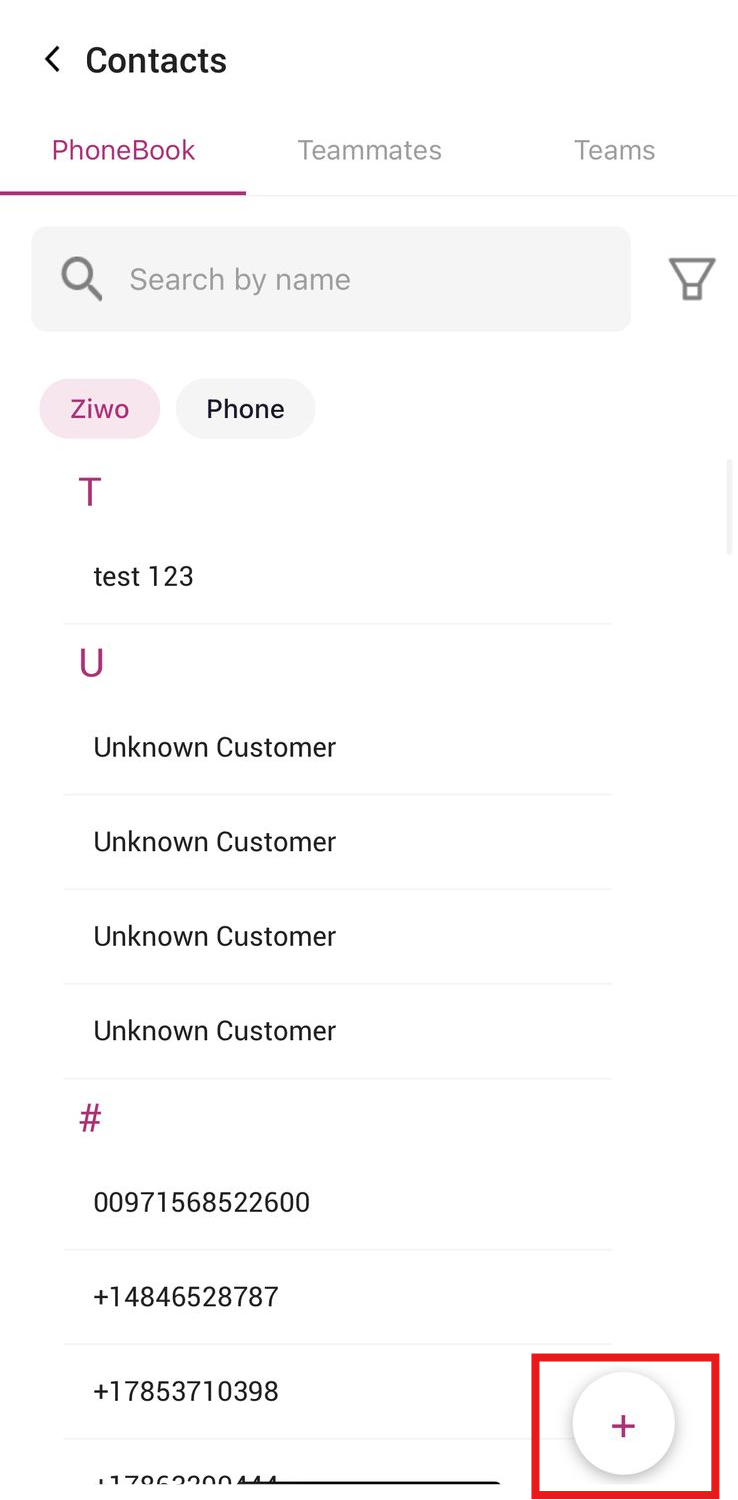
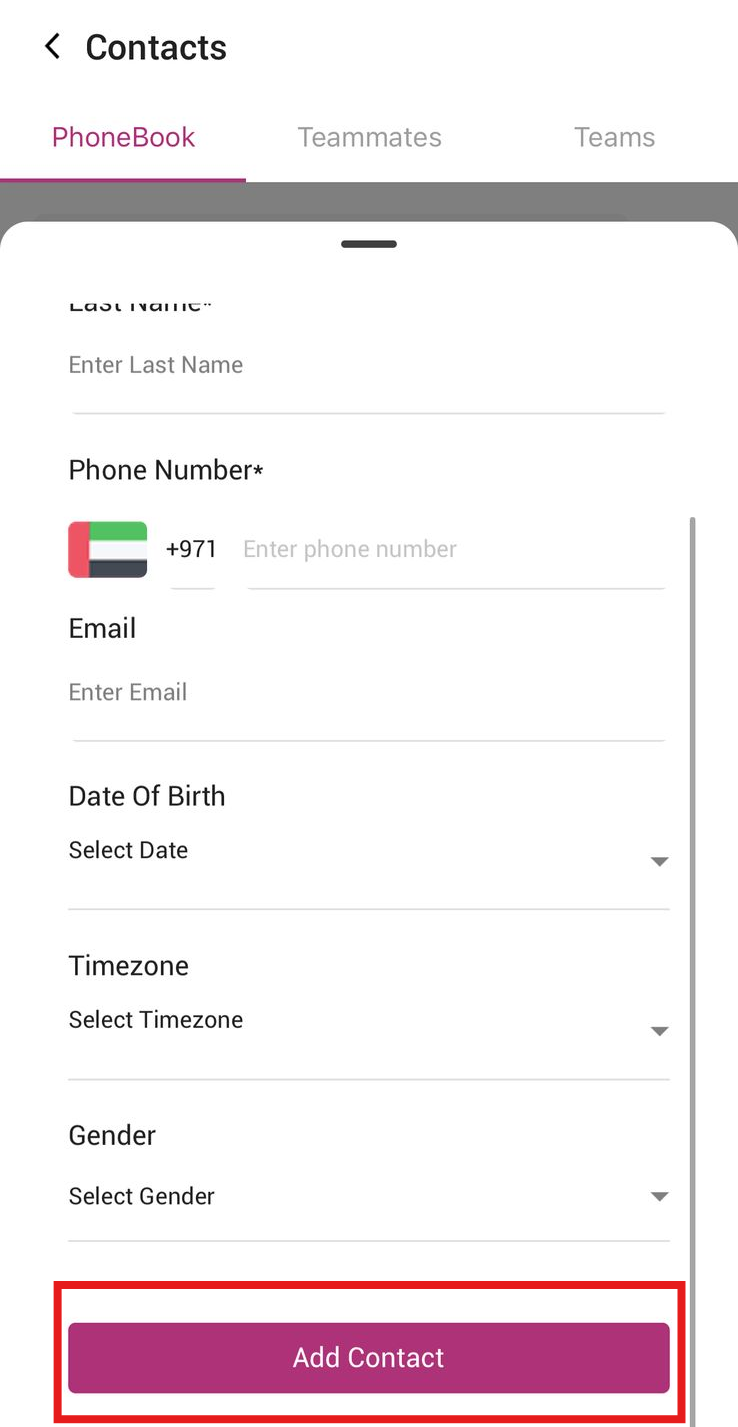
- Add New Contact: If you want to add a new contact to the app, you can find an Add Contact Button (typically a plus sign or similar) within the Contacts section. This allows you to manually input contact information such as name, phone number, and additional details.
- Edit Contact: For existing contacts, you may have the option to edit their details by tapping on a specific contact’s name and selecting the Edit button.
- Delete Contact: If a contact is no longer needed, you can delete it from the list. This option may appear within the Edit menu or as a delete option next to each contact’s name.
3. Grouping and Categorizing Contacts
- Groups or Tags: Depending on the app’s features, you may be able to organize your contacts into groups. For example, you might create a group for clients, prospects, internal team members, or any other category. This feature can help you keep your contact list organized, especially in large businesses.
- Favorites: The app may also allow you to mark contacts as favorites, making it easy to quickly find and call them. These contacts might be displayed at the top of the contact list or in a separate Favorites Section.
4. Contact Synchronization (If Applicable)
- Sync with Phone Contacts: If you’ve allowed the app access to your device’s contacts, it may sync your phone’s contact list with the Ziwo app, ensuring that all your contacts are accessible in one place.
- CRM Integration: If your Ziwo account is integrated with a CRM system, your contacts may be automatically imported from the CRM, making it easy to keep track of customer relationships, interactions, and other details.
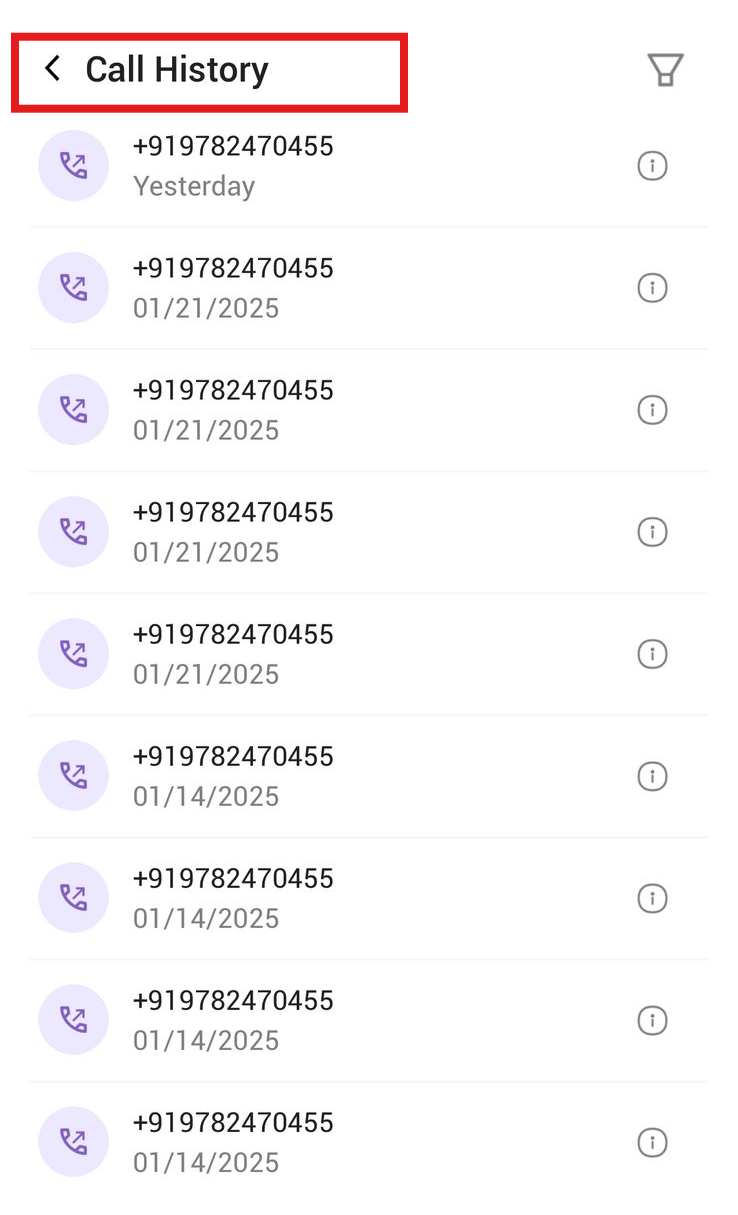
Call History Section in the Ziwo Mobile App
The Call History Section in the Ziwo Mobile App keeps a record of all your incoming and outgoing calls. This section is crucial for tracking past interactions, reviewing call details, and managing customer interactions efficiently.
1. Accessing the Call History Section
- Location: The Call History Section can typically be found on the Home Screen or Main Dashboard of the app, often under a Call History Icon or a button labeled "Call History".
- Interface: Once you open the Call History Section, you will see a list of calls made and received. The list may include calls to and from contacts stored in the app or phone, as well as unknown numbers.
2. Features and Functions in the Call History Section
Recent Calls
- Call Log: The Call History section will show a log of recent calls, typically displayed in reverse chronological order (most recent call first). Each call entry will show:
- Caller/Receiver Name: The name of the person or organization you communicated with (if available).
- Phone Number: The phone number associated with the call.
- Call Duration: The duration of the call (e.g., 5 minutes, 30 seconds).
- Call Date and Time: The exact date and time the call was made or received.
Call Outcome
- Call Status: Each entry in the call history will typically show the status of the call, such as:
- Answered: The call was answered by you or the recipient.
- Missed: The call was missed and not answered.
- Voicemail: If the call went to voicemail, it will be noted as such.
- Rejected: If you declined the call, it may show as rejected.
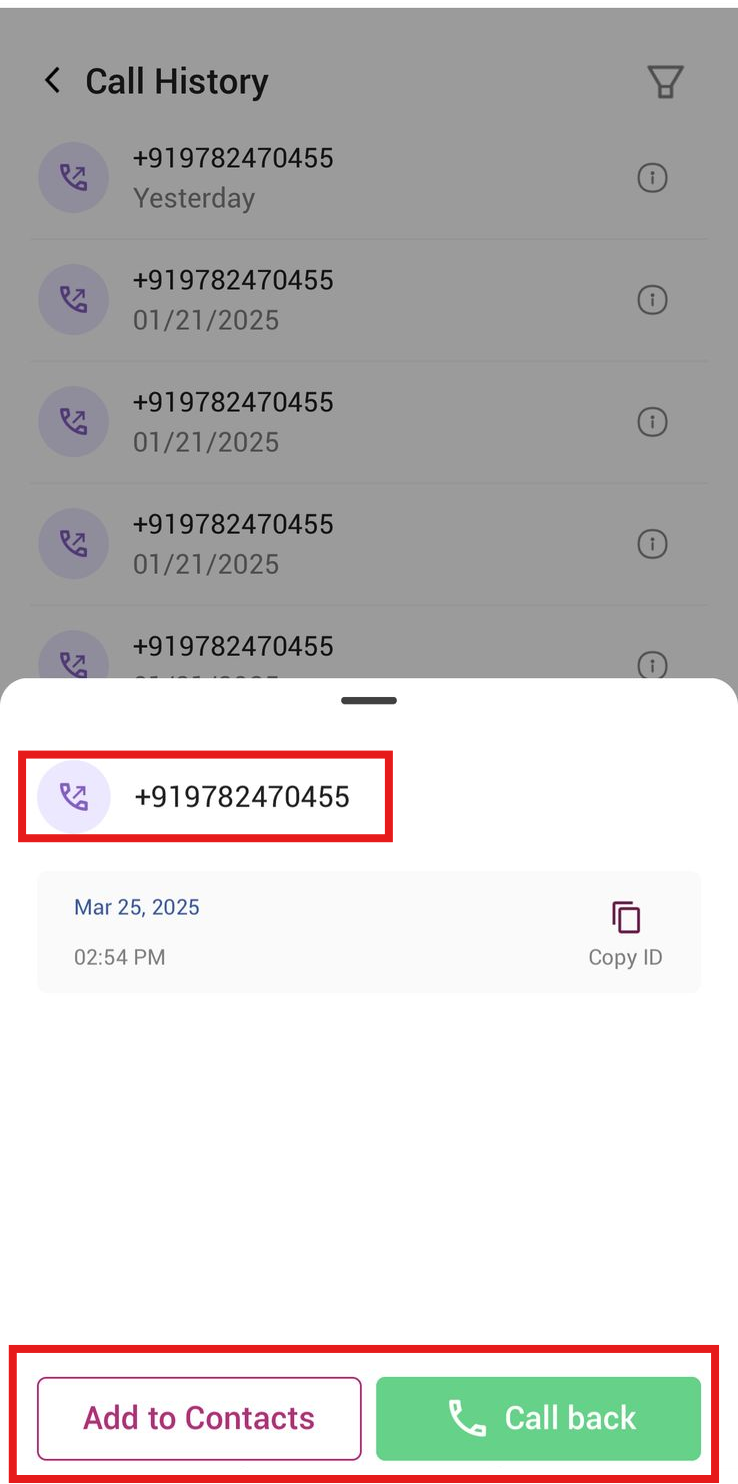
Call Options
- Redial: If you want to call someone back, simply tap on the number or contact name from your Call History list. This will open the Dialpad with the number pre-populated, and you can press the Call Button to redial.
- Add Call Notes: After a call, you may have the option to add notes related to the conversation. This feature is helpful for remembering key discussion points, follow-up actions, or outcomes.
- Delete Call Log: If you want to delete specific call entries or clear the entire call history, the app typically provides an option to delete individual entries or the full call history.
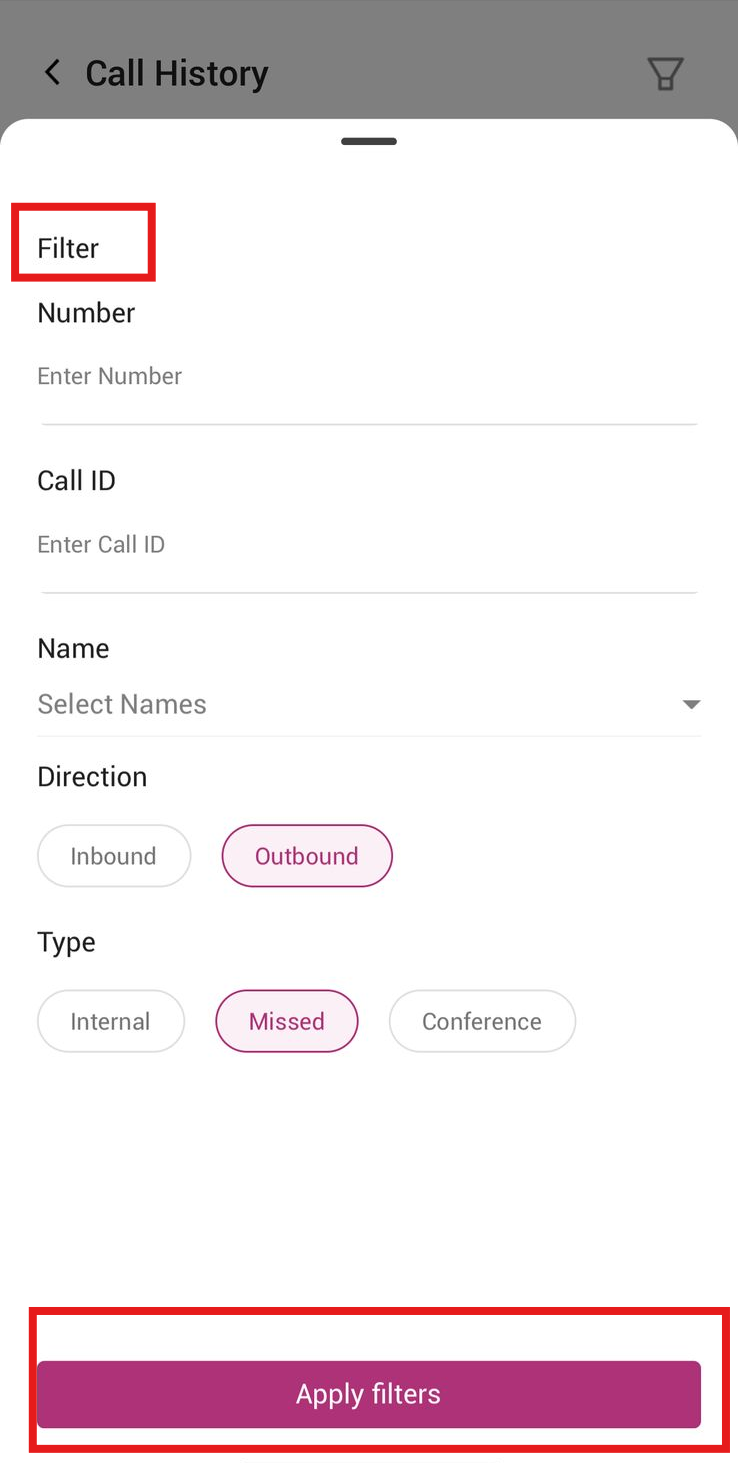
Filtering and Sorting
- Filter by Call Type: The Call History section may allow you to filter calls based on their status, such as answered, missed, voicemail, or rejected.
- Sorting: You may also have the option to sort your call history by Number, call type, Call IDor contact name.
Voicemail Access
- Voicemail Notifications: If a call goes to voicemail, you’ll receive a notification in your Call History list indicating that a message was left.
- Listen to Voicemails: Tap on the voicemail notification to access and listen to the voicemail recording.
3. Call History Notifications
- Missed Call Alerts: If you have missed a call, the app will send you a notification in the Call History section, indicating which call was missed and the option to return it.
- Follow-up Actions: Based on the outcome of the call (e.g., unresolved issues, missed calls), you may have the option to set reminders or schedule follow-up actions directly from the Call History section.
4. CRM Integration (If Applicable)
- Log Call Details: If your Ziwo account is connected to a CRM system, call details (such as call duration, outcome, and notes) may automatically sync with the CRM.
- Customer Interaction History: This integration allows you to access a comprehensive view of all previous interactions with customers or clients, right within the Call History section.
Conclusion
The Contacts and Call History sections in the Ziwo Mobile App are crucial components for managing communication effectively and keeping track of customer or client interactions.
- The Contacts Section allows you to organize and access your contact list, initiate calls, and manage contact details.
- The Call History Section provides a record of your incoming and outgoing calls, with features for redialing, adding notes, filtering calls, and accessing voicemail.
Together, these sections provide a seamless experience for users, ensuring that all communications are well-organized and easily accessible for follow-ups or reference.