
Creating a Campaign for Zdial
A campaign in Ziwo Dialer (ZDial) is a structured effort to manage a set of outbound calls, typically targeting a specific group of contacts with a defined objective, such as sales outreach, customer follow-up, or marketing promotions. The campaign management feature allows you to automate and optimize the calling process, track performance, and ensure efficient use of agent resources.
Steps to Create a Campaign:
- Login to the Ziwo Dashboard: Access the Ziwo portal by logging into your account with appropriate credentials.
- Navigate to the Campaigns Section: On the dashboard, go to the click on the admin icon->Channel->Voice->Dialer.
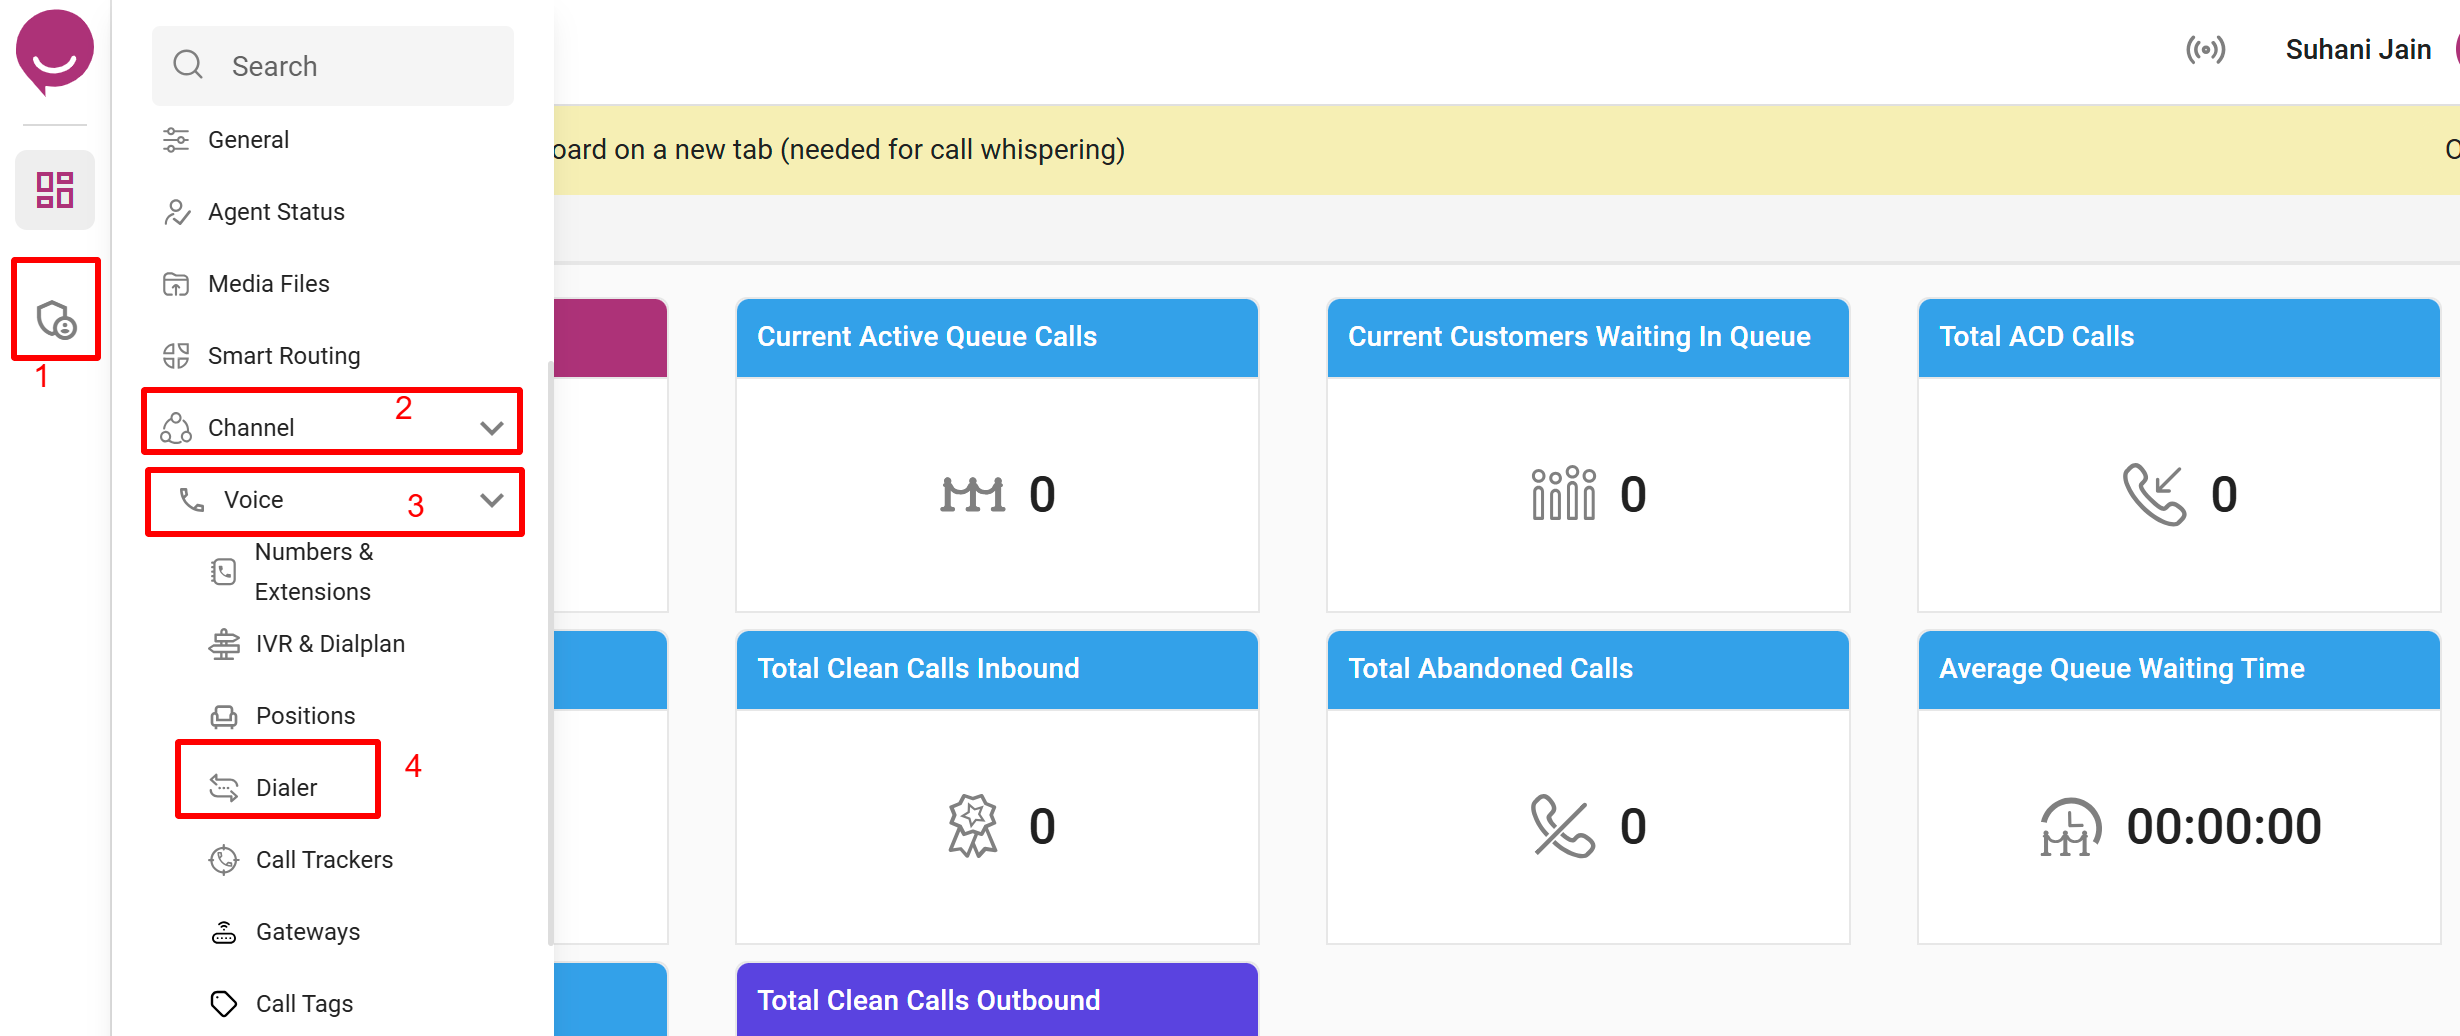
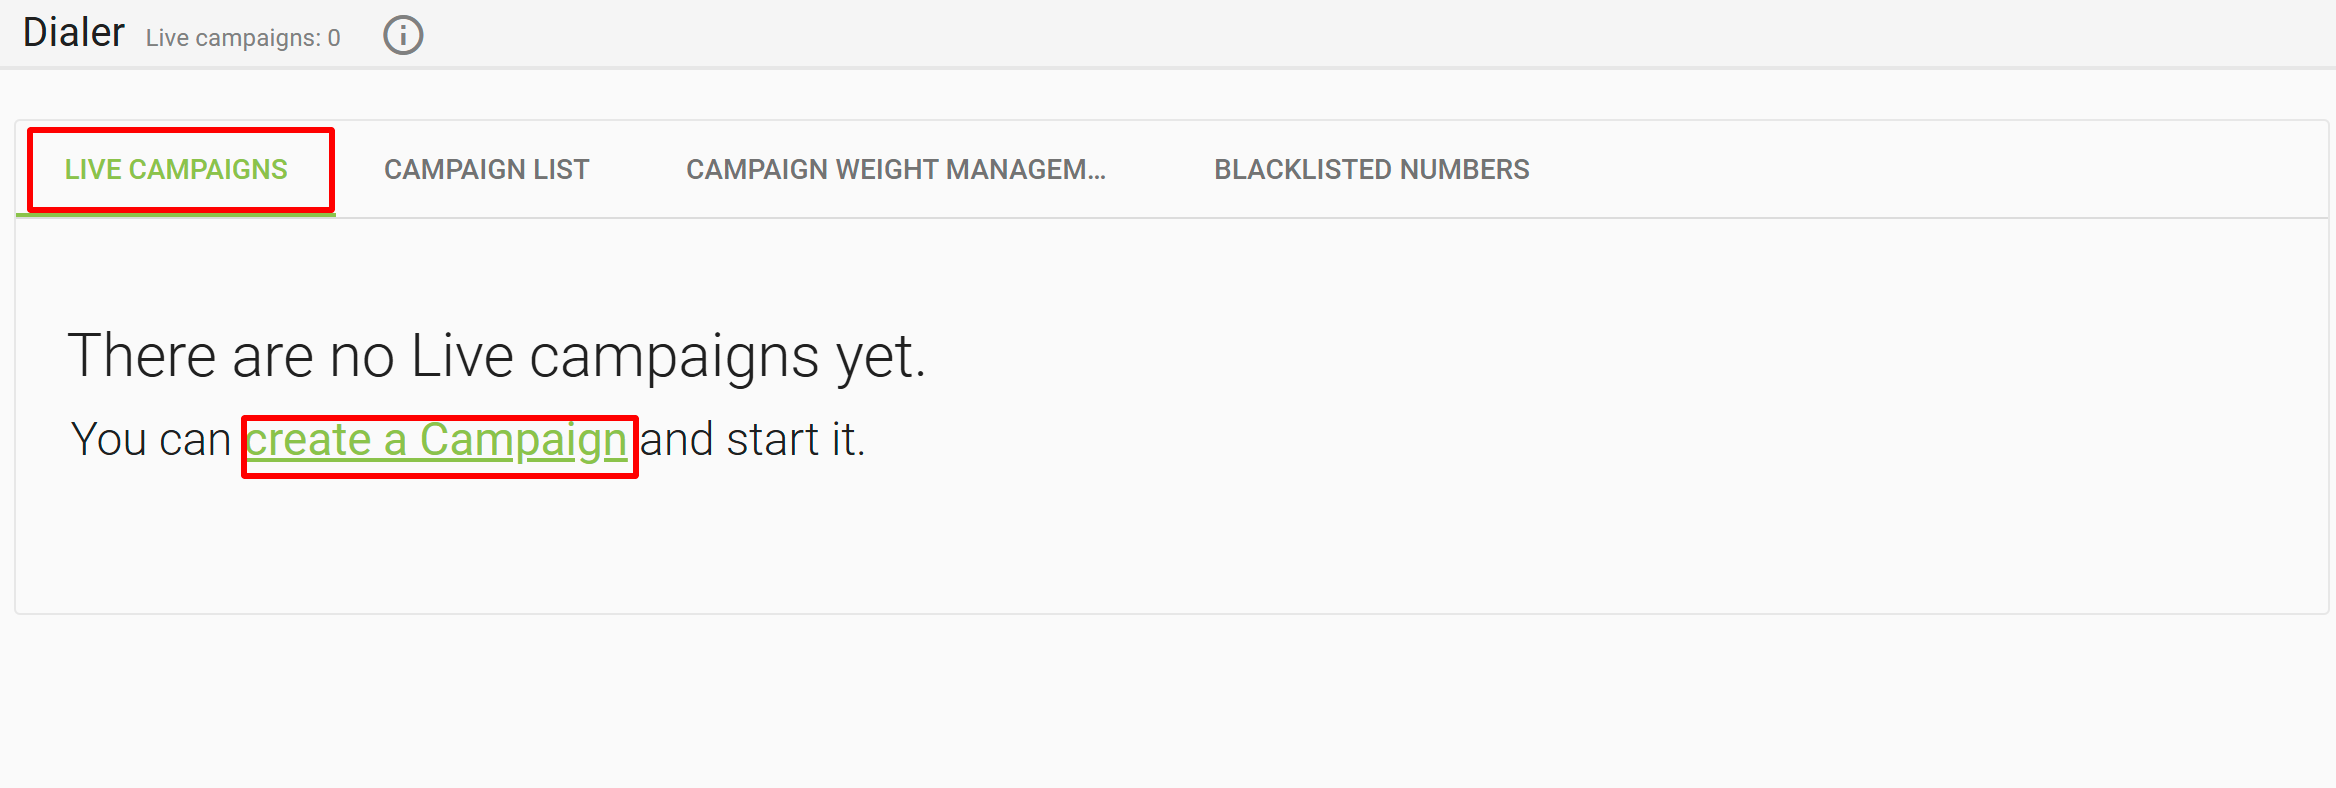
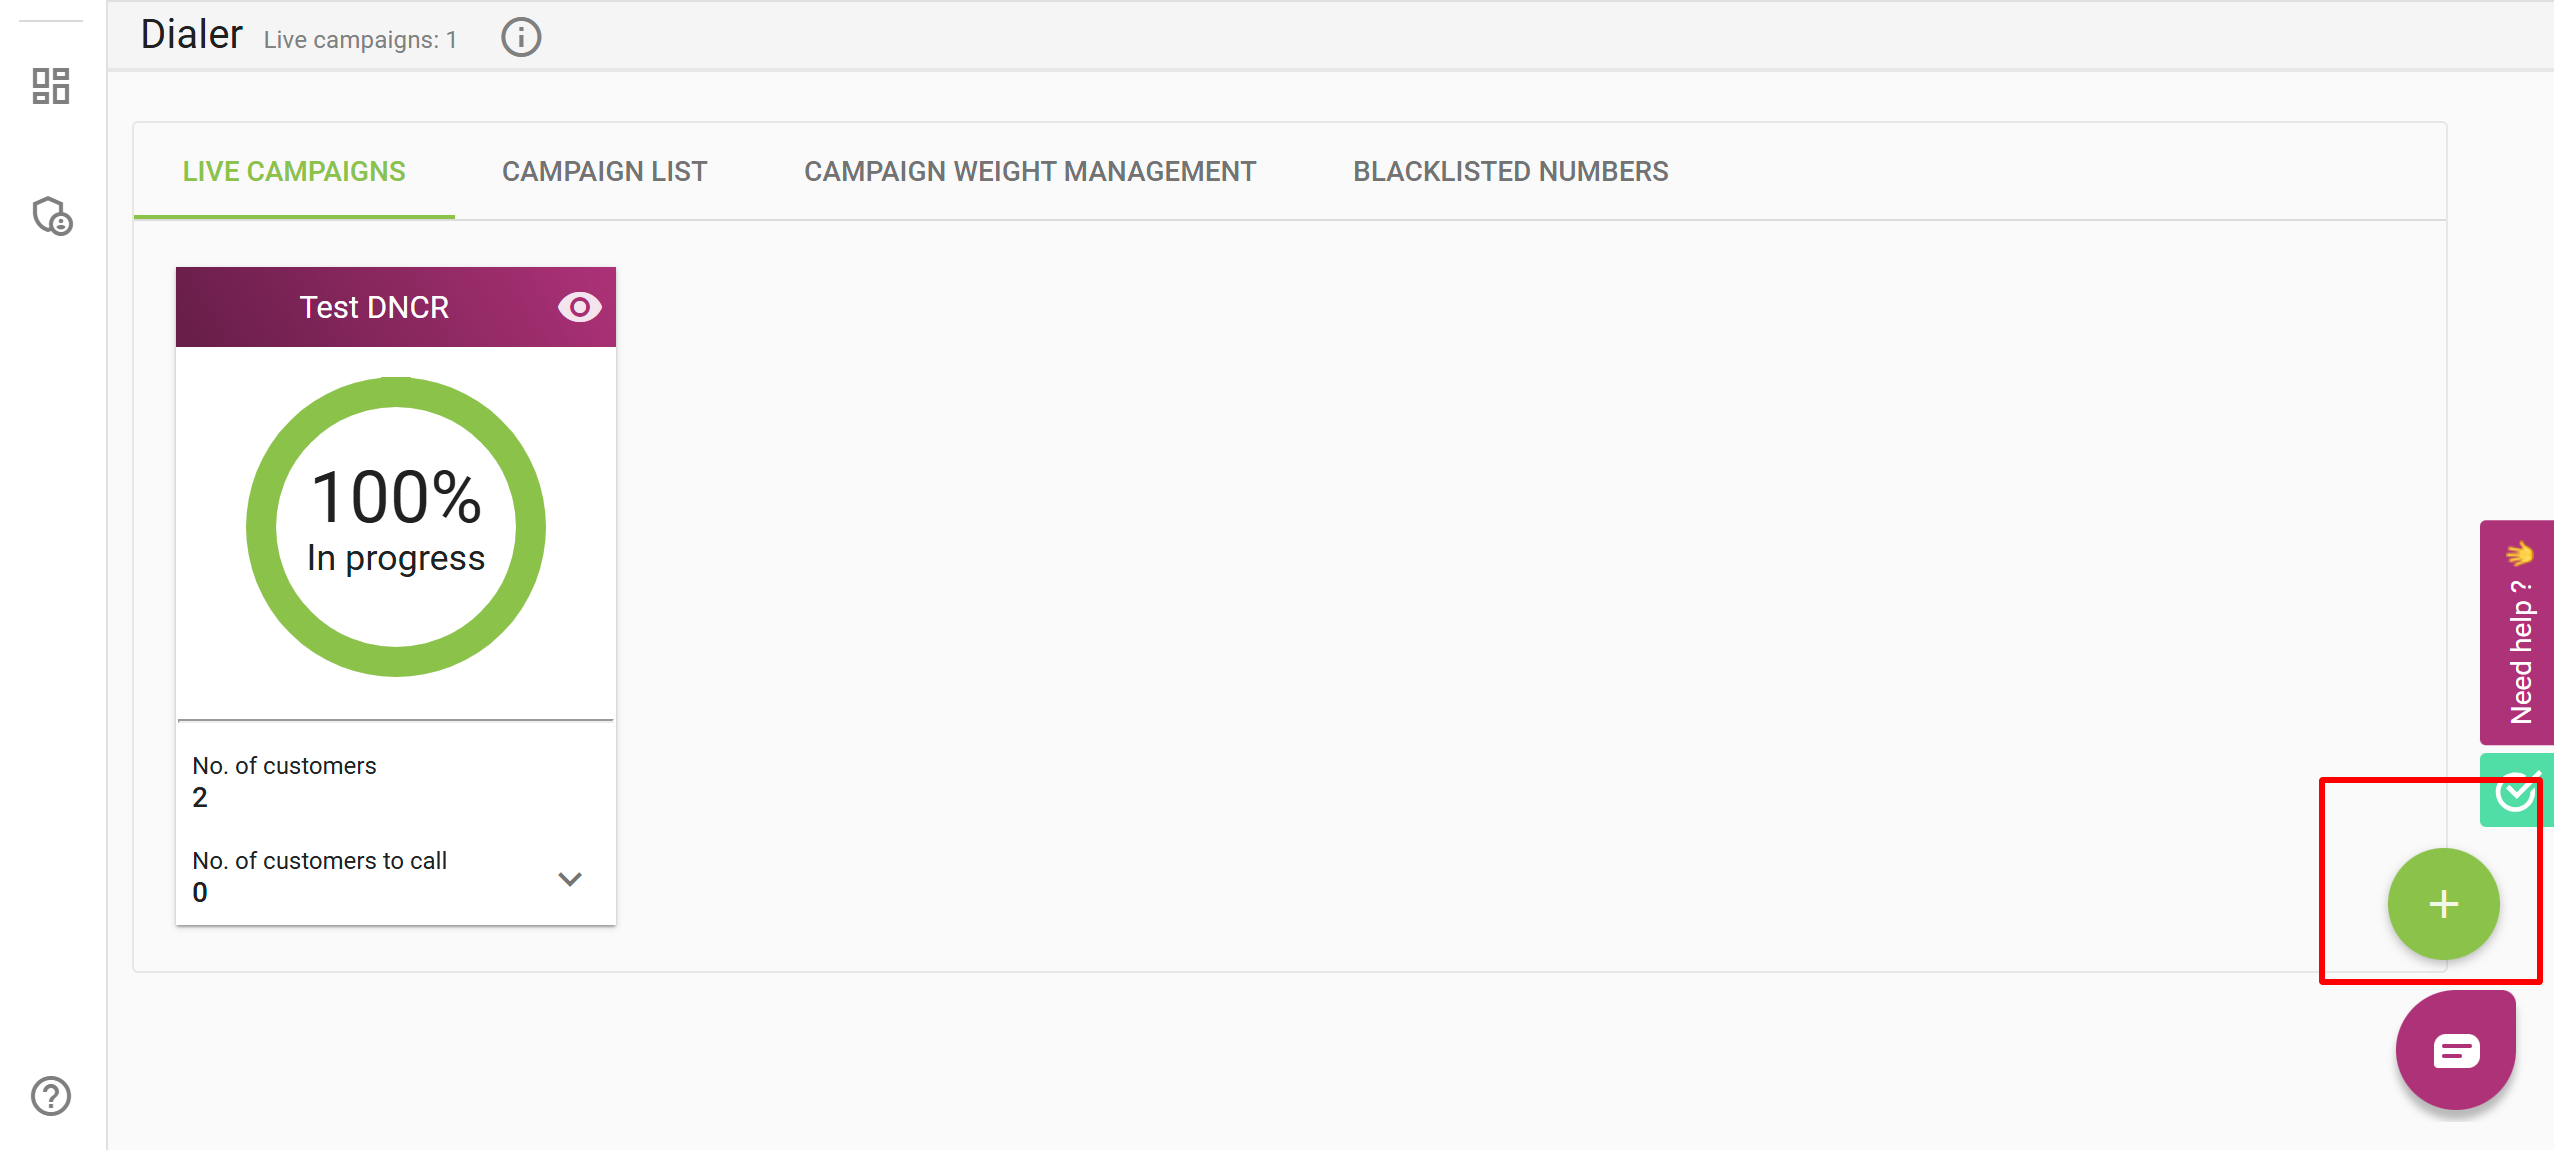
- When you click on the dialer, then you will redirect to the Dialer page, where you can see the option to create the campaign.
- Create a New Campaign: Click on the "Create New Campaign" button or similar option to start setting up your campaign if there is no campaign present, otherwise you can see the "+" icon. click on that to create the another campaign.
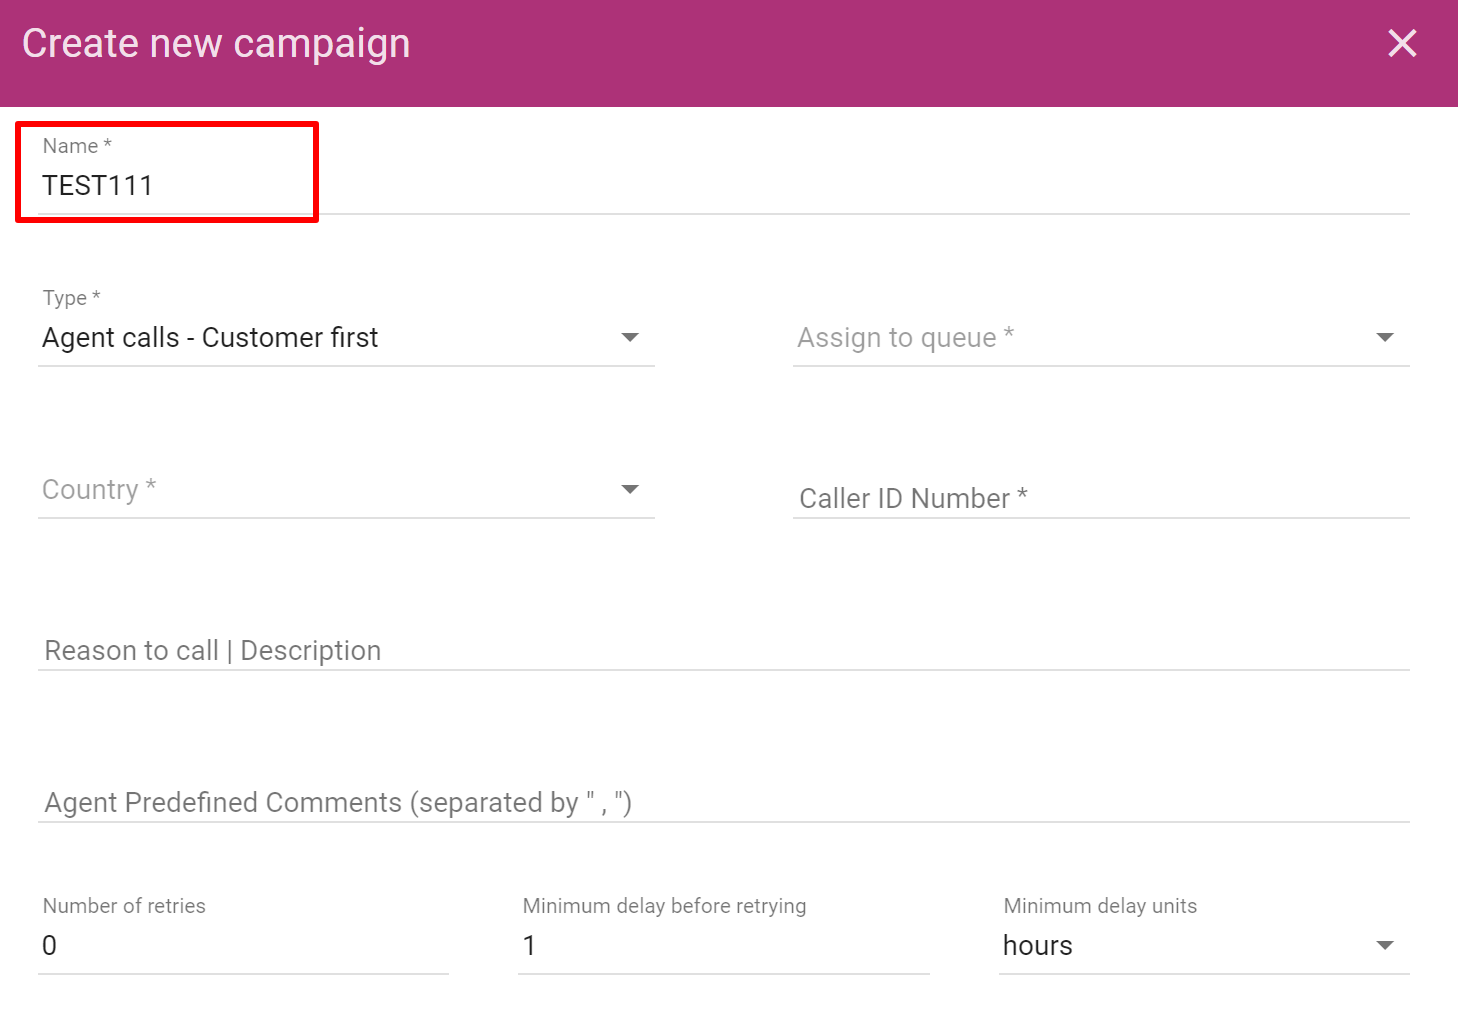
- After you click for the new campaign, you need to fill the following details:
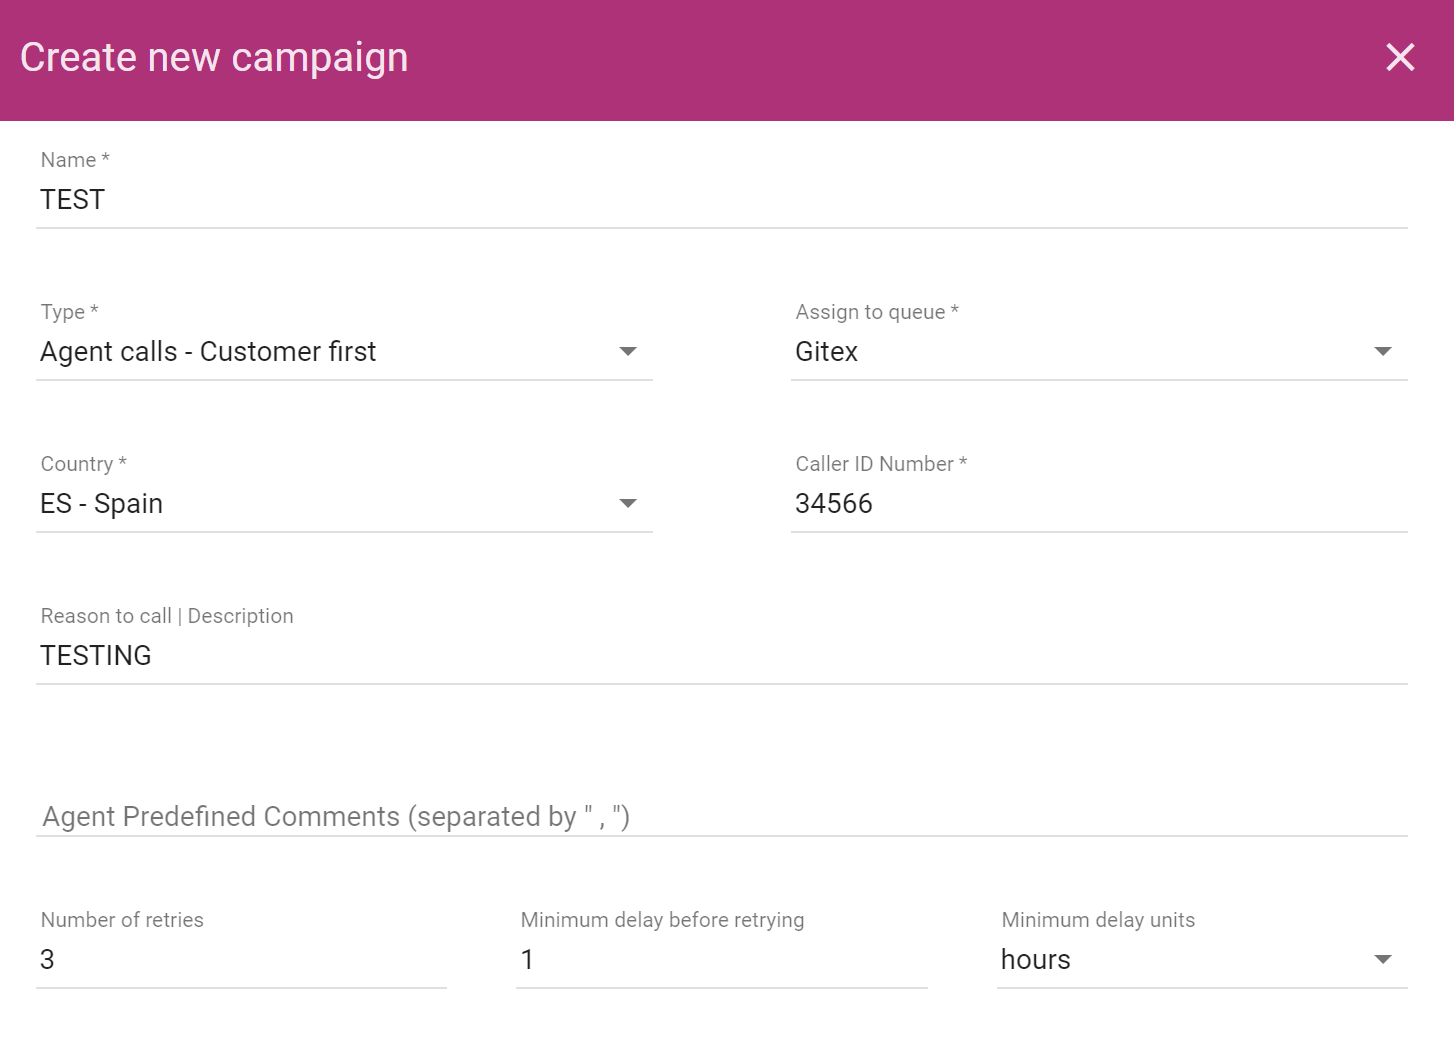
- Campaign Name: Enter a name for your campaign (e.g., "Customer Follow-Up", "Lead Generation", etc.).
-
Type of Campaign:
Choose the type of campaign from the available options:
-
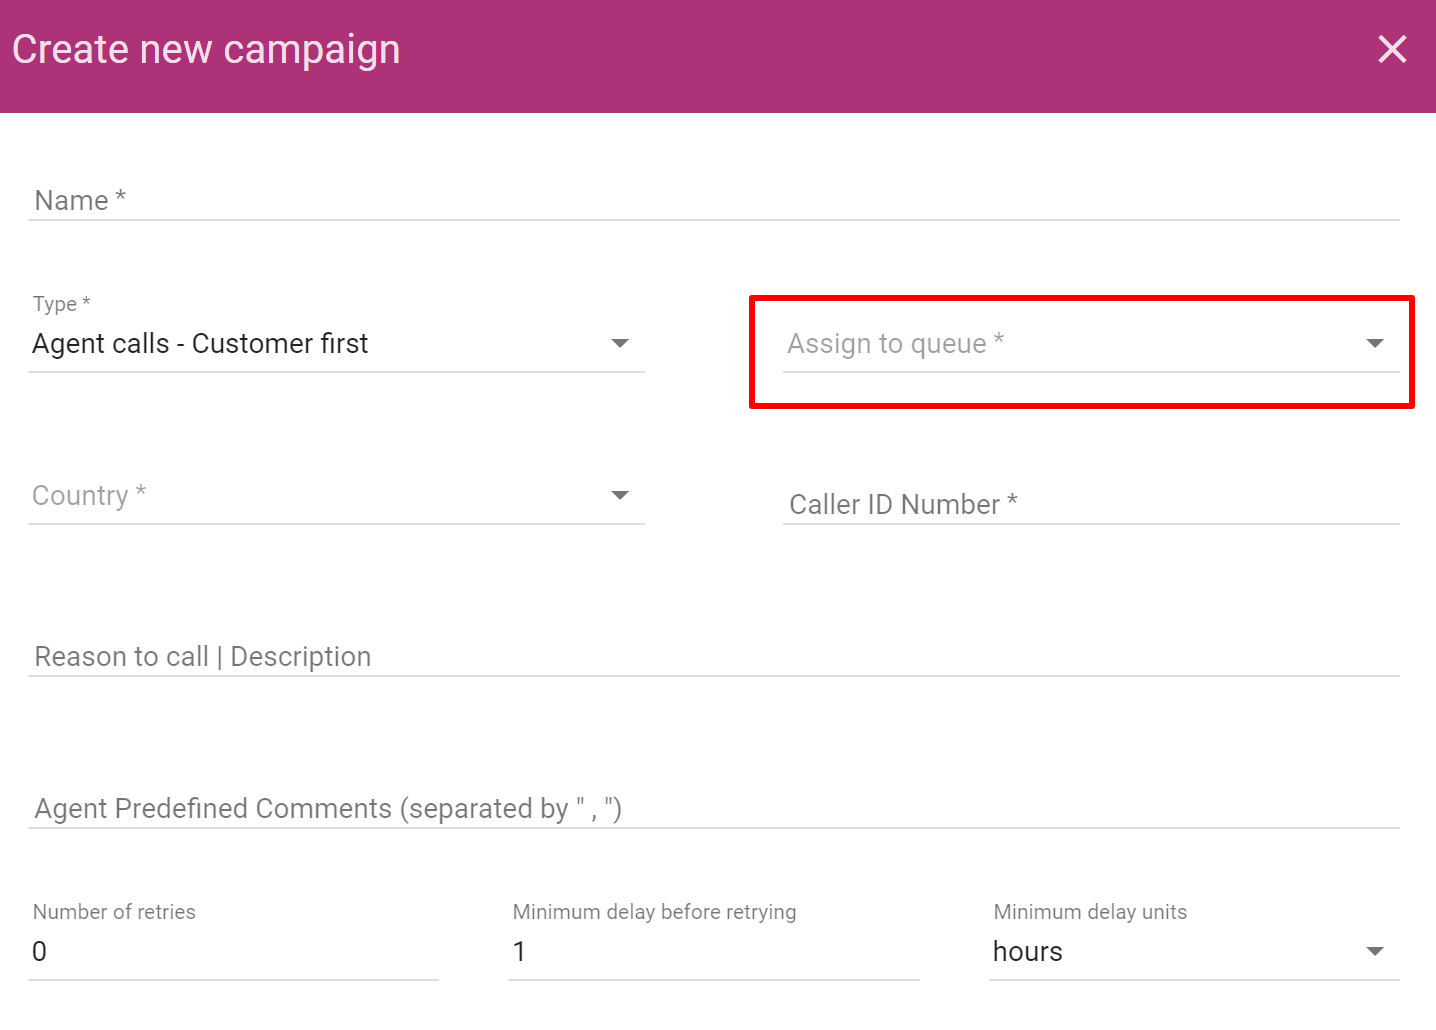
Agent Calls - Customer First: The calls will be sent by the system to the customer first.
- Assign to Queue: Once the customer is connected, if the call needs to be handled by an agent. The system assigns the call to a queue. This queue holds the call until an agent becomes available.
-
Agent Calls - Agent First: The agent’s phone rings before connecting to the customer.
-
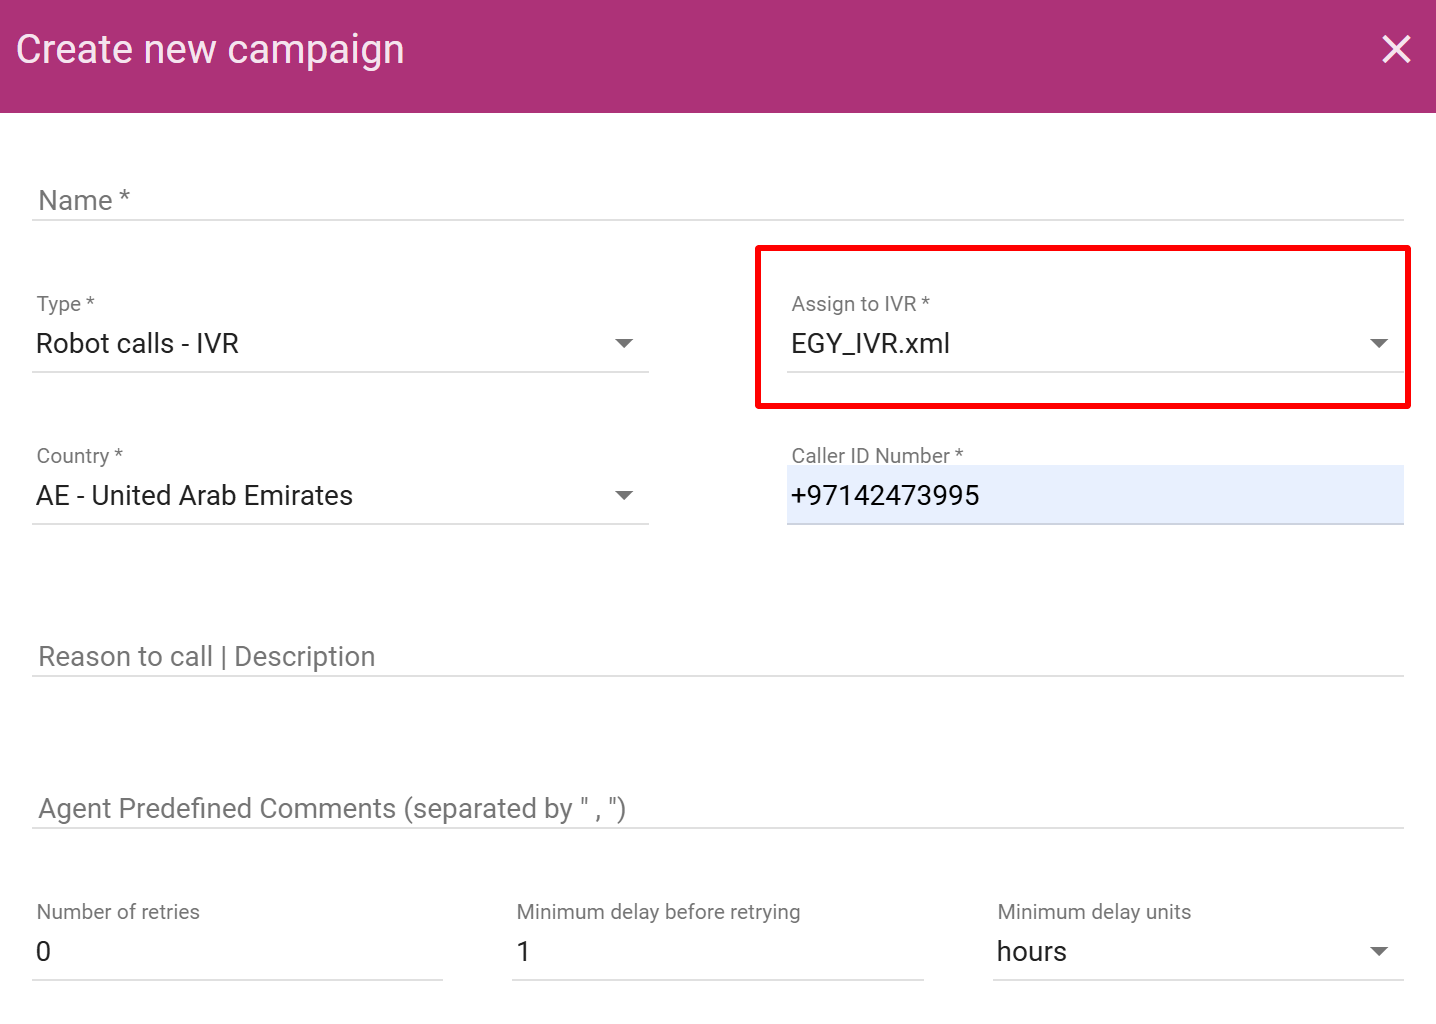
Robot Calls - IVR: Automated calls with an Interactive Voice Response (IVR) system.
-
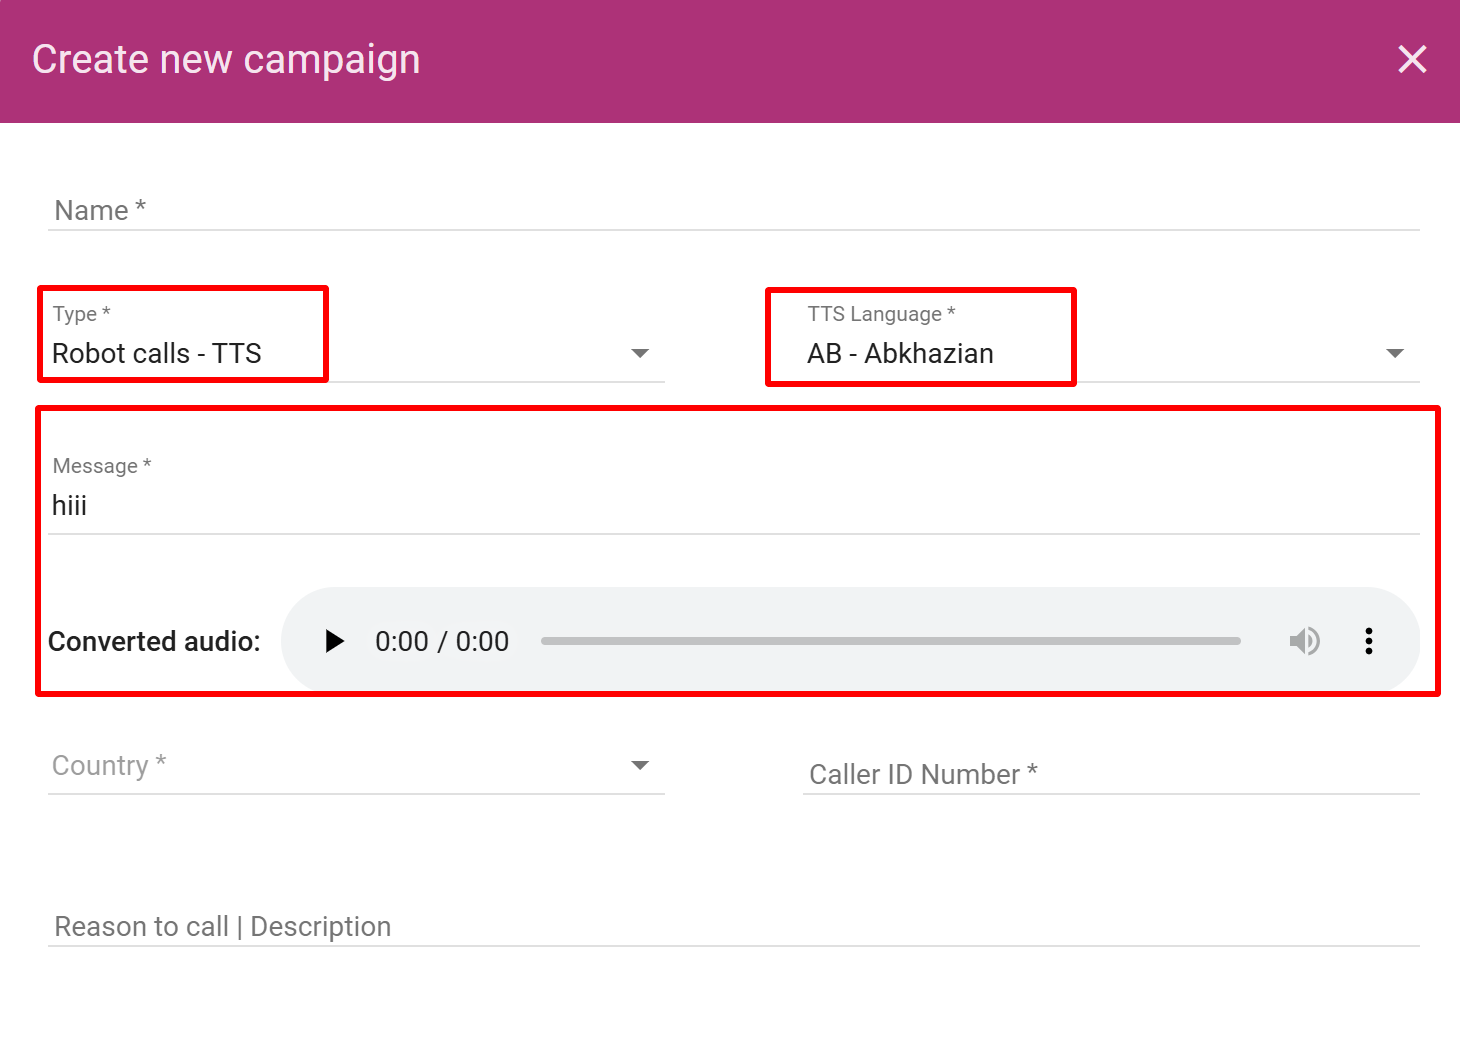
Robot Calls - TTS (Text-to-Speech): Automated calls using Text-to-Speech technology to read predefined scripts. You will write the script under the message option.
- Language: You can choose the language of your choice from the language option for the automated speech.
-
-
Assign to IVR: It means routing an incoming call to an Interactive Voice Response (IVR) system instead of directly to an agent. The IVR plays pre-recorded prompts, allowing the caller to choose options (e.g., press 1 for sales, press 2 for support) or provide information (e.g., account number). Based on the caller's input, the IVR can either resolve the issue automatically or route the call to the appropriate agent or department. This helps streamline call handling, provide self-service options, and reduce agent workload. If your campaign requires an IVR, select the IVR you want to assign to this campaign. This is applicable for campaigns that involve Robot Calls - IVR.
-
Country: When importing local phone numbers to an international format, the country code is used to convert local phone numbers into a globally recognized format that includes the appropriate international dialing code. This process is essential for ensuring that phone numbers are formatted correctly for international communication.
-
Caller Id Number : This refers to the phone number that appears when customers receive a call from the company.
-
Reason to Call: Specify the reason for the call (e.g., "Sales", "Support", "Reminder", etc.). This helps categorize the campaign and provides context for the agents or automated system.
-
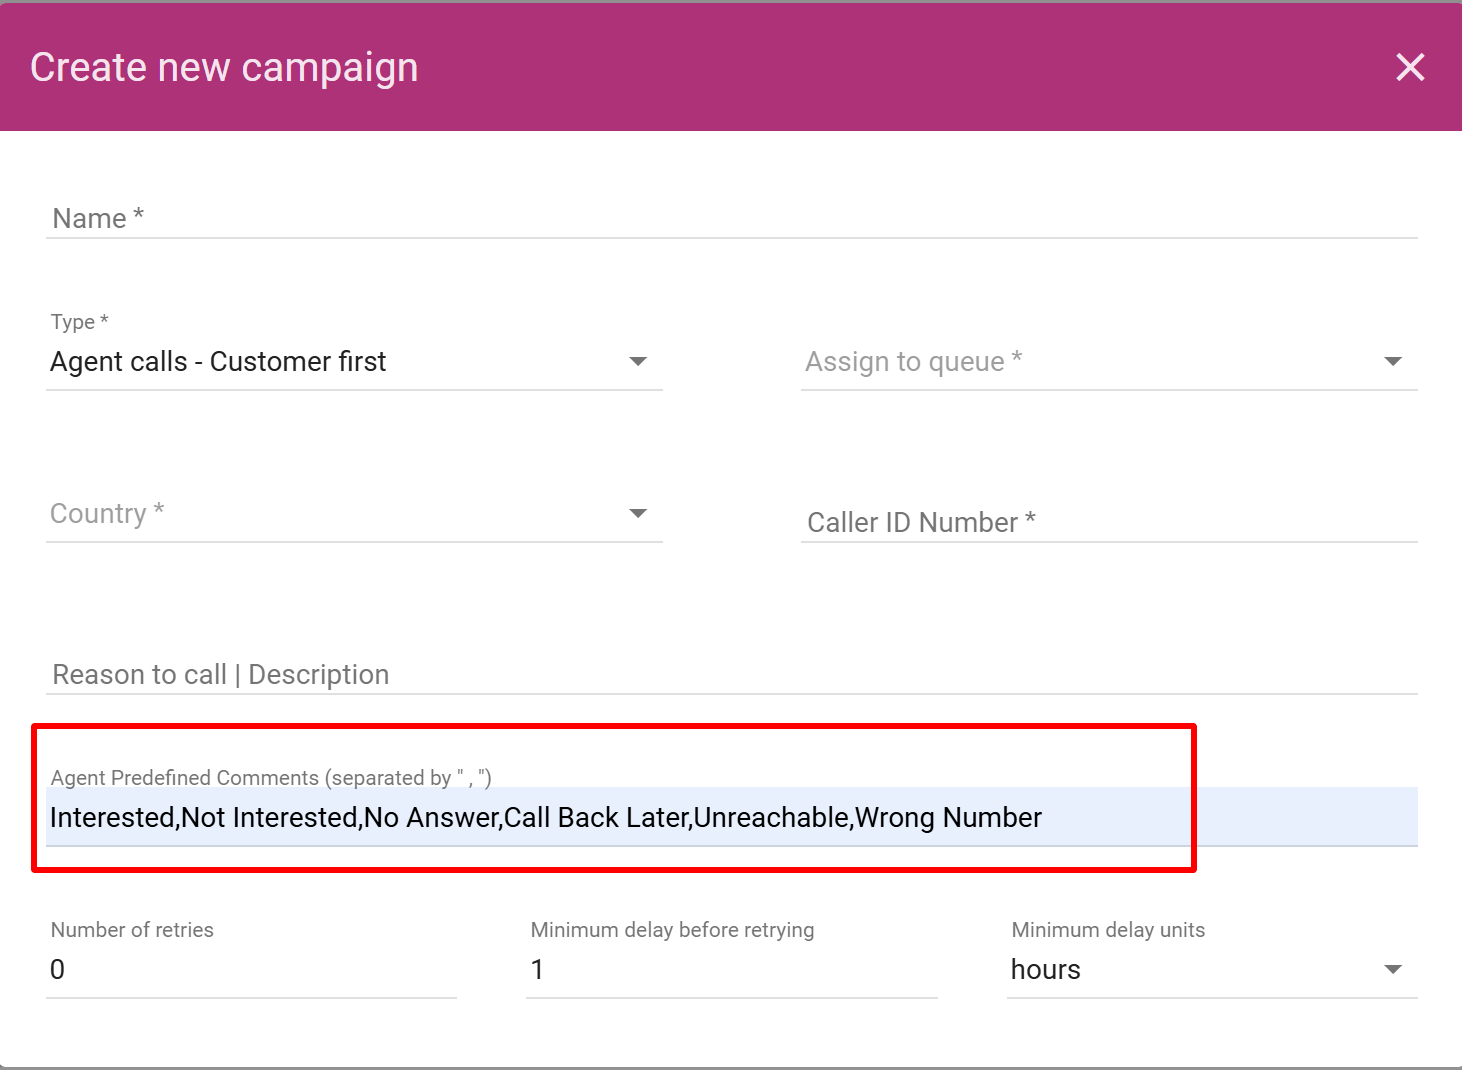
Comment: After each call, agents can write comments to record the outcome of the call. Agents can also choose one of the following predefined Comments.
These comments are useful to take specific actions based on the selected status. For example:
- Interested: The system may schedule a follow-up or move the lead to a sales pipeline.
- Not Interested: The system may mark the lead as no further action required.
- No Answer: The system may retry calling later.
- Call Back Later: The system may set a reminder for a future call.
- Unreachable: The system may mark the number as unreachable and stop further attempts.
- Wrong Number: The system may remove the contact from the list or mark it as invalid.
- This allows the system to track call outcomes and take the necessary actions automatically in the future.
-
Number of Retries: Set the number of retries for the campaign. This defines how many times the system will attempt to call the same number if the initial call was not answered or failed.
-
Minimum Delays Before Retrying: Define the minimum delay (in minutes or seconds) between retry attempts for the campaign. This ensures there’s a gap between each retry, preventing too many calls to the same number in quick succession.
-
Minimum Units (Hours or Minutes): This defines the duration between the each retry. The minimum units for retry delay in either hours or minutes.
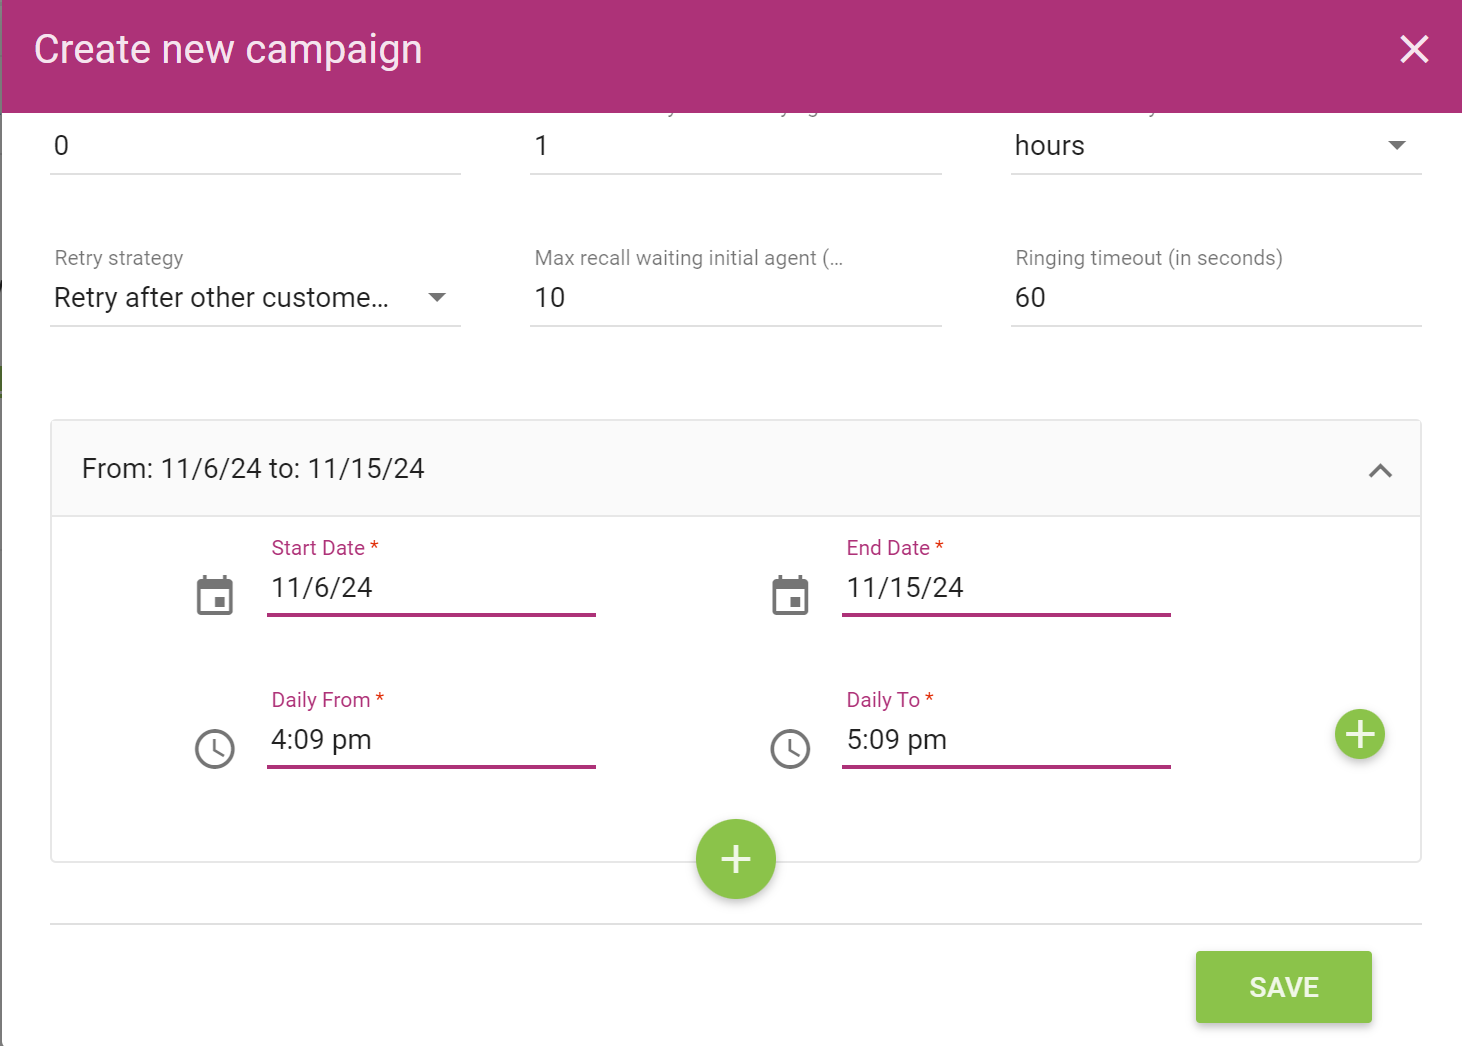
- **Maximum Recall Waiting Initial Agent:**Maximum Recall Waiting Initial Agent is a system feature that automatically attempts to reconnect with the customer if the current agent is busy and unable to answer the call. The system continues to try to establish a connection until predefined period of time, ensuring that the customer is called back once the agent becomes available.
For example you can set it to 30 seconds or few minutes/Hours. - **Set Ringing Timeout:**Adjust the ringing timeout for the agent.
For example, set Ring Timeout to 20 seconds.
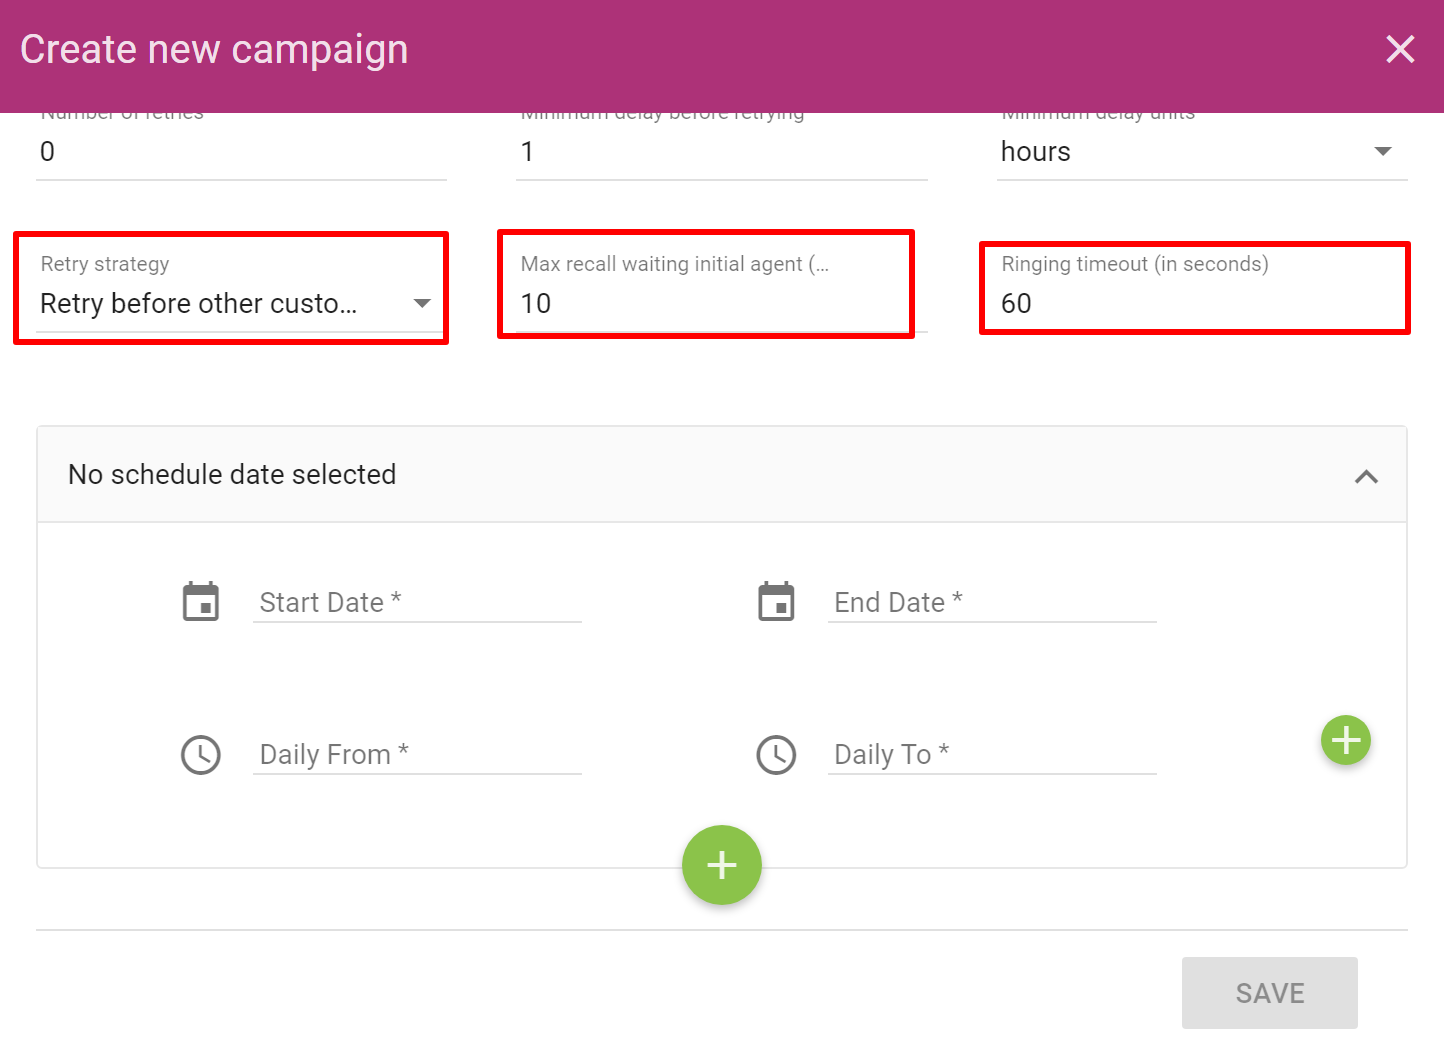
- Set Start and End Date with Time:
- This the time and date which you set for the campaign to start.
- Select the start date and time for when the campaign should begin.
For example: 2024-11-07 09:00 AM. - Select the end date and time for when the campaign should end.
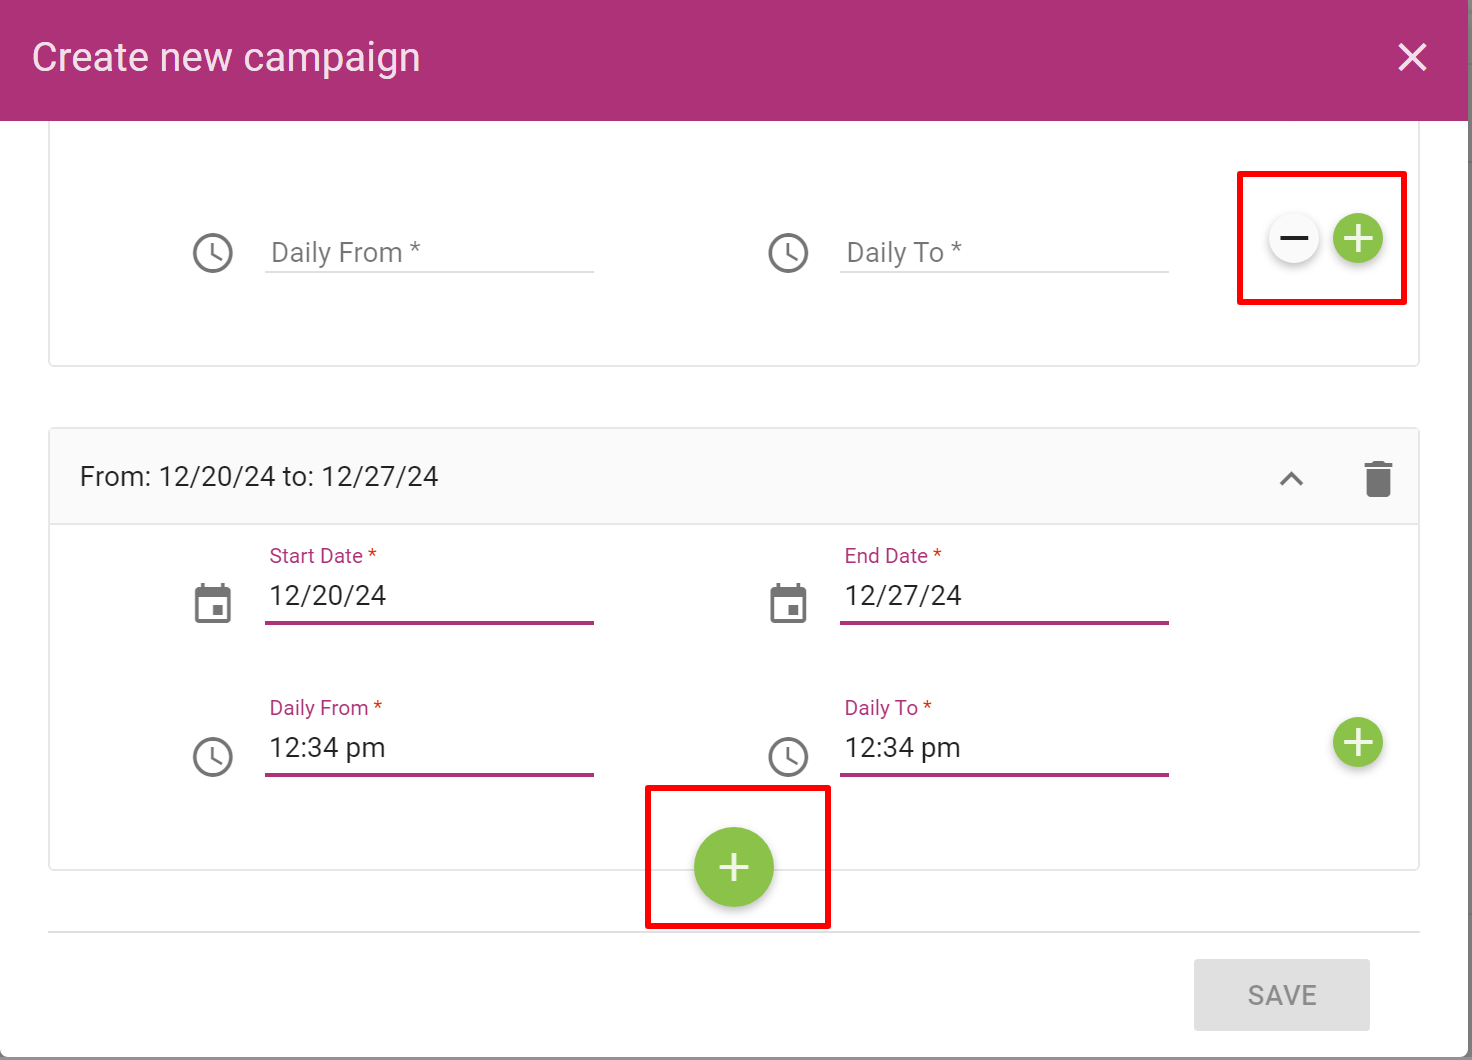
For example: 2024-11-07 06:00 PM. - If you want to select multiple time intervals, then click on the "+" icon and add the multiple time intervals.
- If you want to delete the time intervals then click on the "-" icon and delete the particular time intervals.
- Select the start date and time for when the campaign should begin.
- This the time and date which you set for the campaign to start.
- If you want to add the break between two time interval, then add another start and end time. if will create break between both the time intervals.
- Click on the save button after filling all the details.
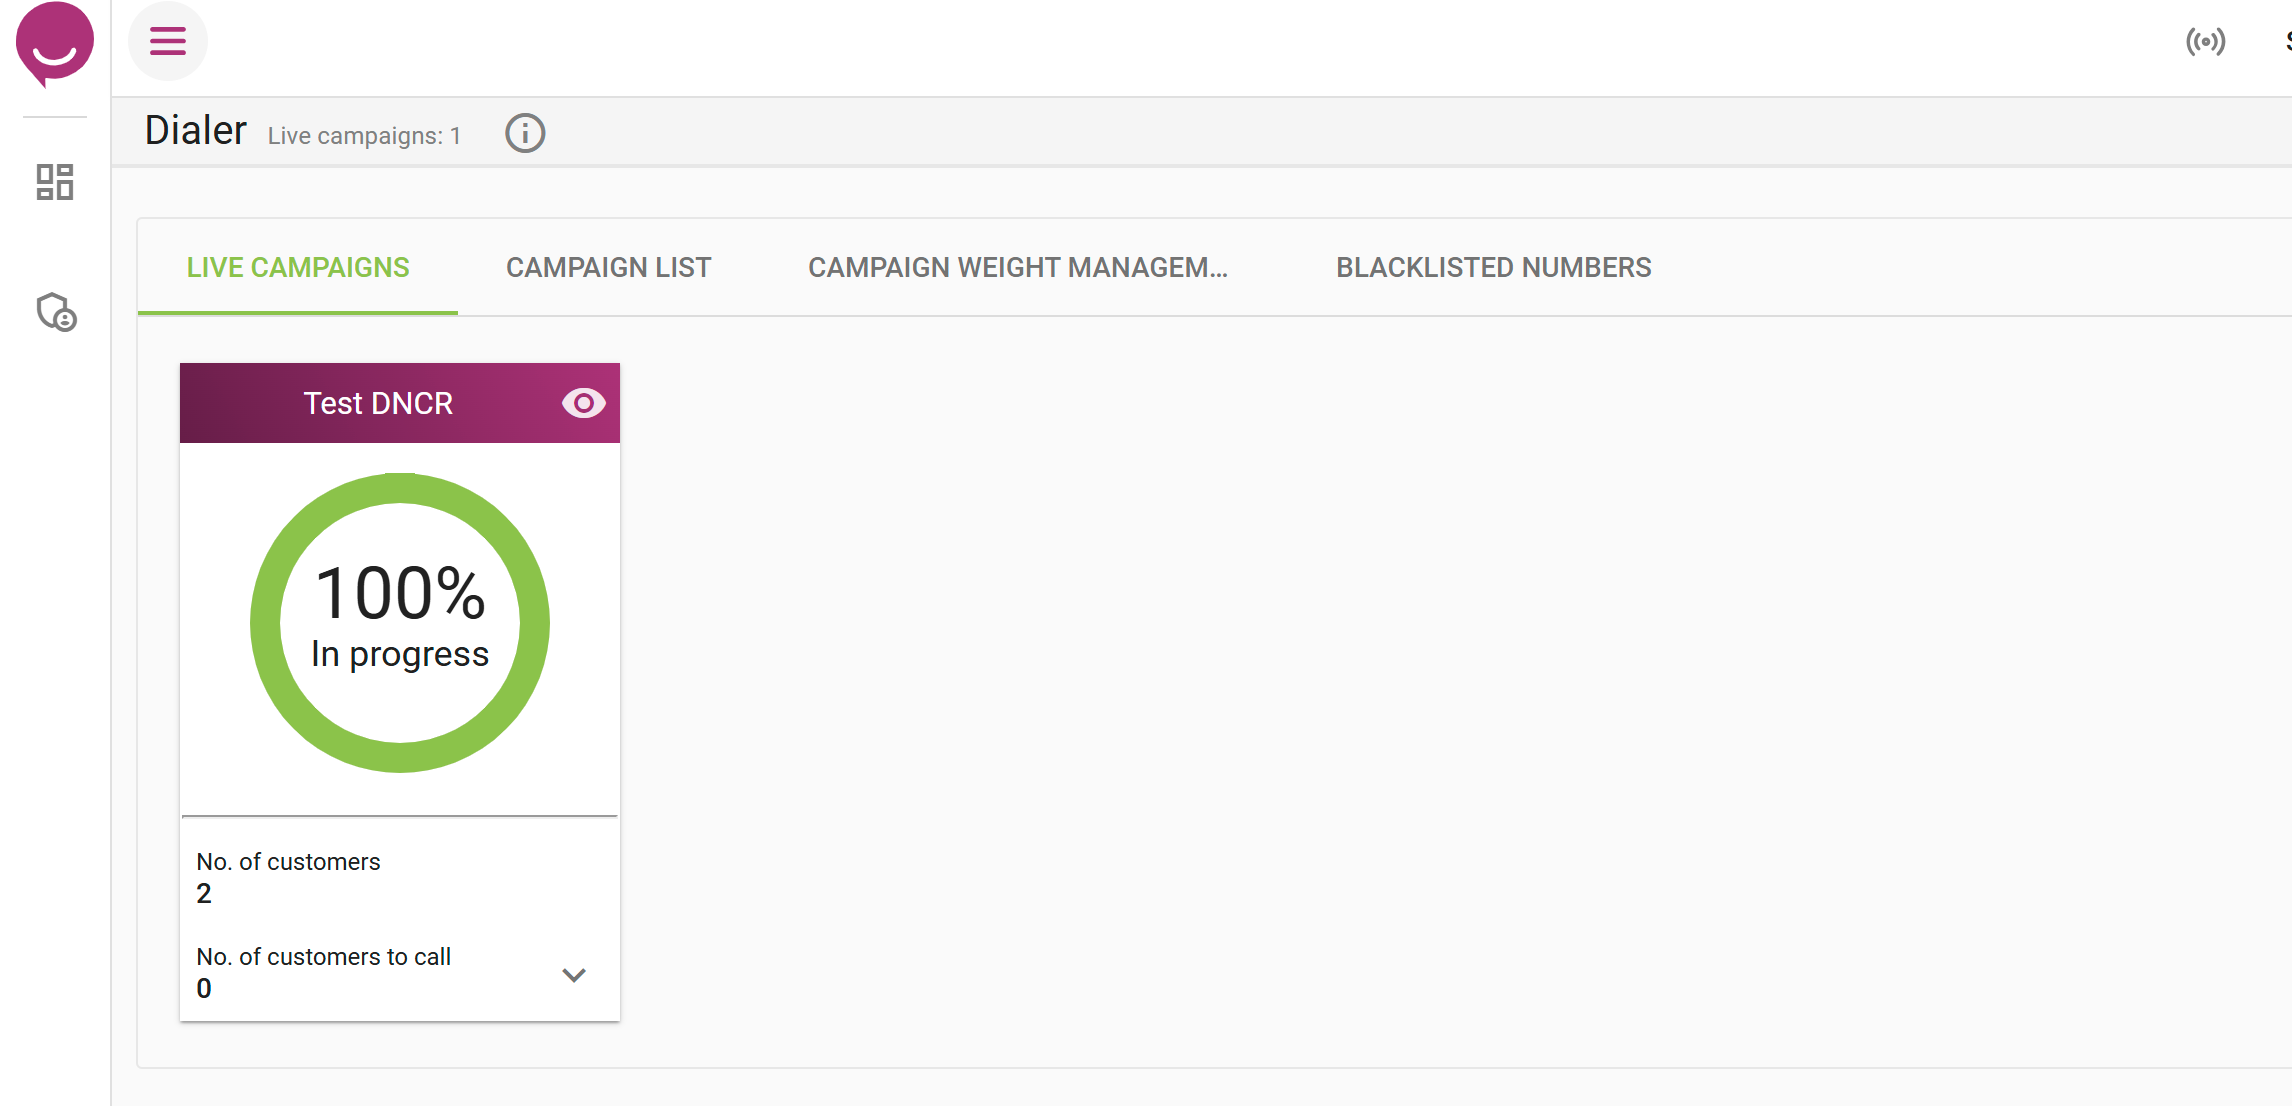
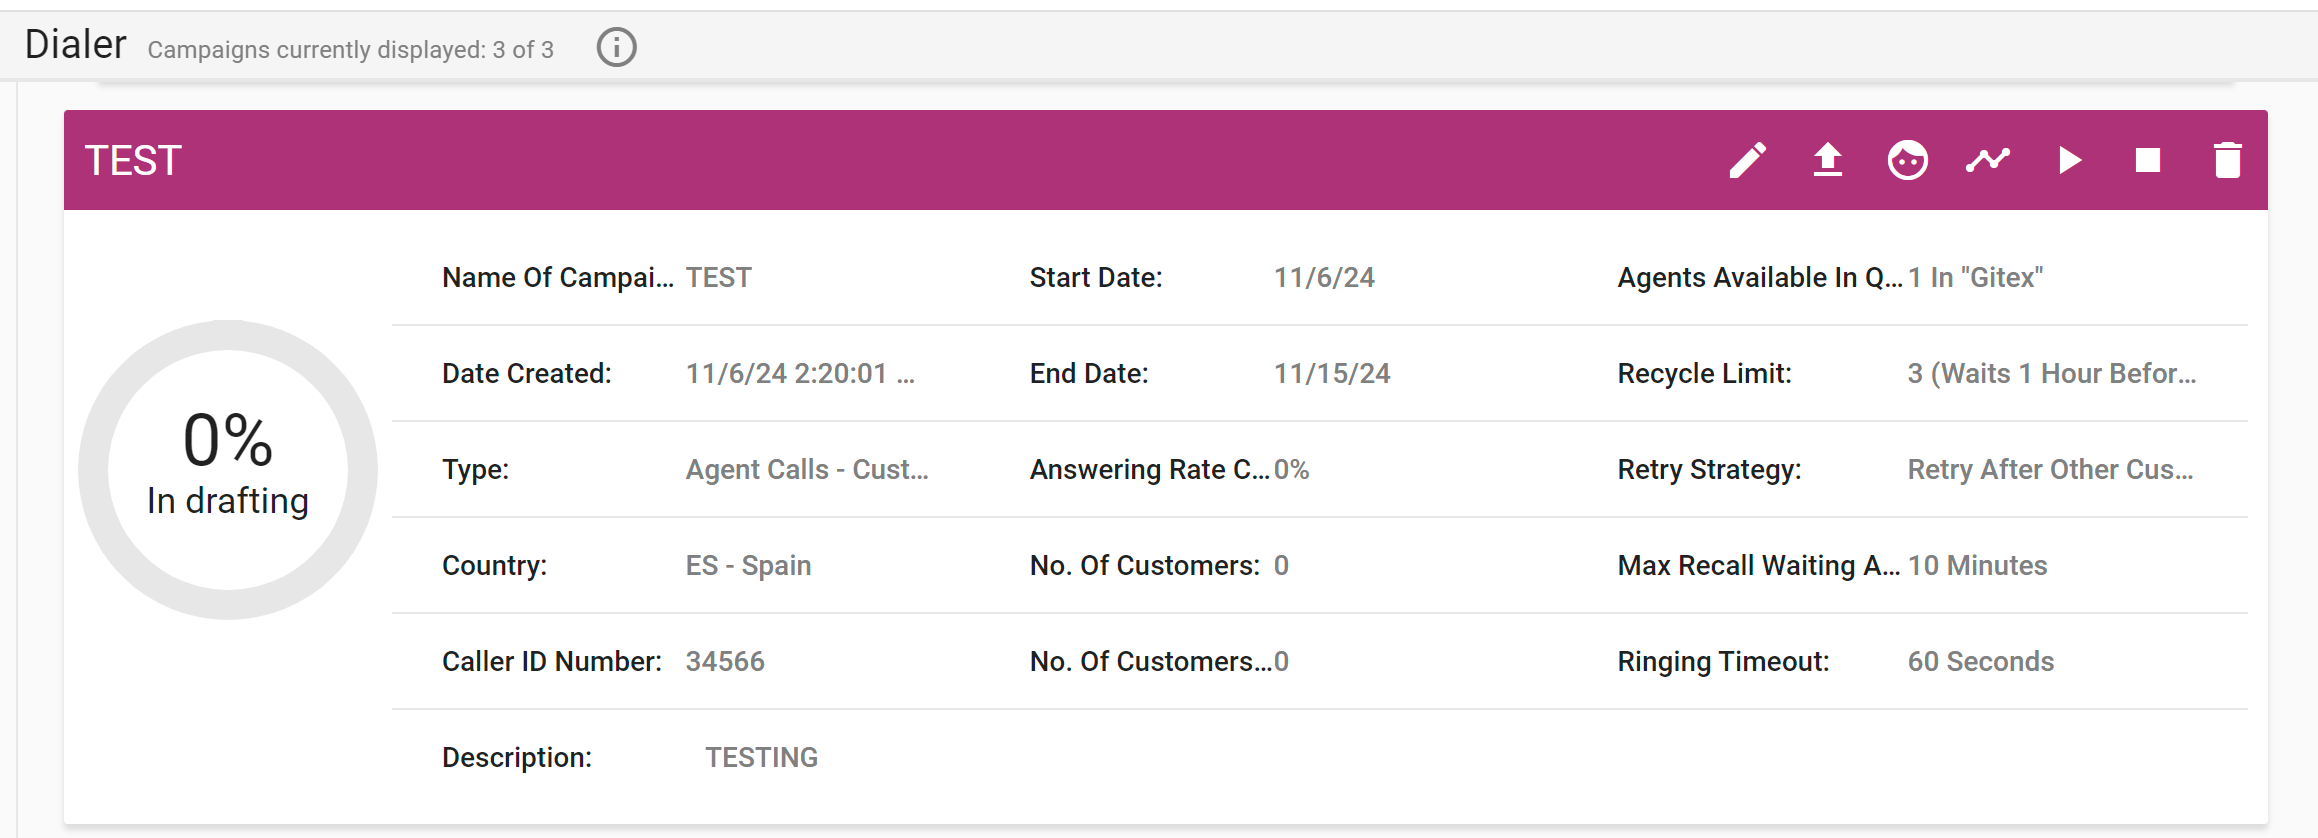
- After the save , this is how it looks:
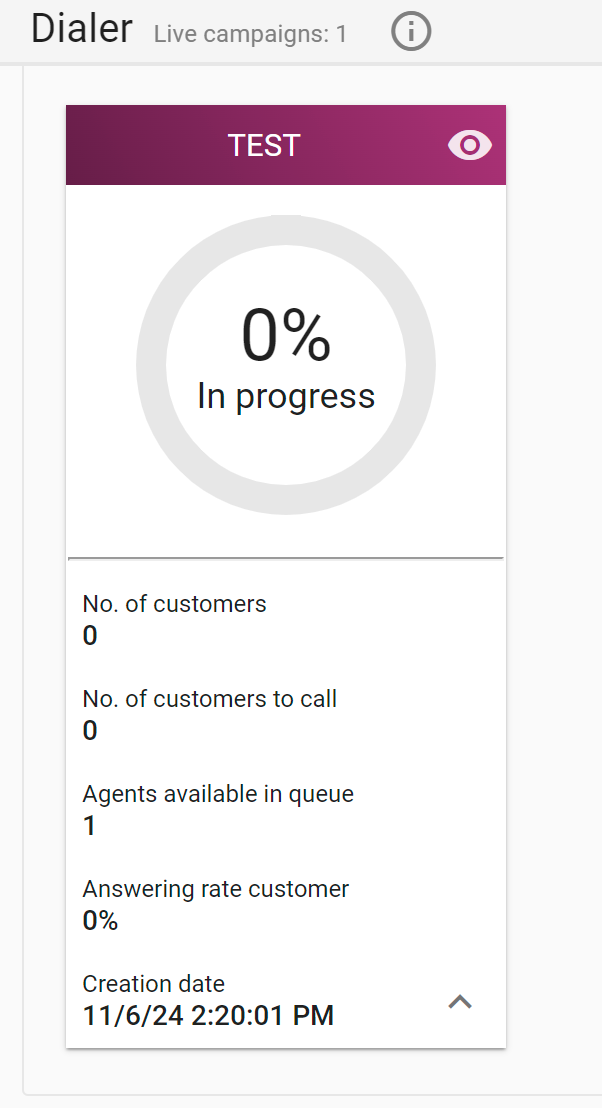
- Now click on the start button for campaign to go live.
- This is how it looks on the live campaign tab. All the details and progress is shown on the dashboard on the real time basis.
Note: You can start and pause the campaign again but cannot stop the campaign restart the same campaign, if you stop the campaign, then you need to create the campaign again.
.