Manual Conversation Transfer
Manual Transferring of Conversations: Manual transferring allows agents to reassign a conversation from one agent to another. This can be useful when the current agent is unable to handle the conversation due to workload, skill requirements, or other reasons. Below is an overview of how manual conversation transfers work in the system.
Key Rules for Manual Transfer:
- Transfer Eligibility: Conversations that can be transferred: The system allows agents to transfer “New” and “Open” conversations.
- Conversations that cannot be transferred: The system prevents the transfer of “Resolved” conversations. Once a conversation is marked as resolved, it is considered completed and cannot be reassigned.
- Agent Availability: Before initiating a transfer, the system will check if the target agent (the recipient of the transfer):
- Status: The receiving agent must have their status set to “Available” to be eligible for receiving the transfer. This rule can be overridden by the admin's settings for conversation management.
- Transferring to External Numbers: If the conversation involves a call to an external number (e.g., a customer’s phone number), the conversation will remain assigned to the original agent (Agent-1).
The system does not allow the transfer of external calls to another agent; it remains assigned to the agent who initiated the call.
Conversation Transferring Flow
The process for transferring a conversation is as follows:
Step 1 – Initiating the Transfer:
- Agent-1 has a conversation assigned to them (e.g., a new or open conversation).
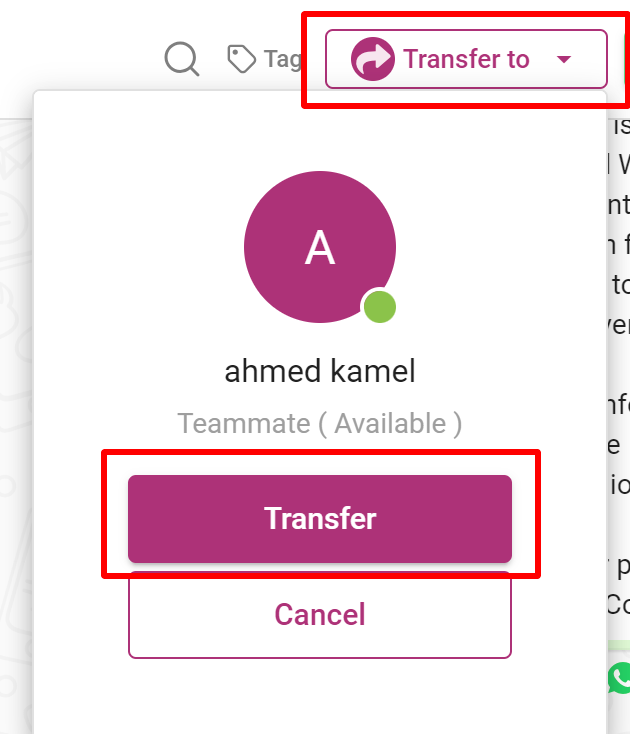
- Agent-1 clicks the “Transfer” button in the conversation interface. The system will display a “Conversation Transferring” modal window with various options.
Step 2 – Selecting the Transfer Criteria:
- Available Toggle: The “Available” toggle button determines whether the system lists only available agents or all agents (including unavailable ones).
- By default, the “Available” button is enabled, which means the system will show only available agents in the transfer list.
- If Agent-1 disables the “Available” toggle, the system will retrieve all agents, regardless of their availability status (both available and unavailable agents will be shown).
Step 3 – Selecting the New Agent:
- Based on the availability of agents, the system will:
- If “Available” is enabled: The system will display a list of agents who are currently available. Agent-1 selects the desired agent (e.g., Agent-2).
- If “Available” is disabled: The system will display a list of all agents, both available and unavailable. Agent-1 can choose Agent-2 or any other agent from this list.
Step 4 – Agent Transfer:
- Once the target agent (Agent-2) is selected, the system: Assigns the conversation to Agent-2.
- Unassigns Agent-1 from the conversation.
Step 5 – System Updates:
- The system will: Set the “has Unseen” flag to true to indicate that the conversation has been transferred and the recipient (Agent-2) has not seen the conversation yet.
- Unread count will not be increased, as this is just a transfer of the conversation to another agent, not a new interaction.
- Set the “hasUnrespondedTransfer” flag to true to mark that the transfer has occurred but the receiving agent has not yet responded.
Step 6 – Notifications:
- Both the source agent (Agent-1) and the receiving agent (Agent-2) will be notified of the transfer.
The receiving agent will now be able to view and continue handling the conversation.