
Building the Connected App
After successfully creating the Connected App, the next step is to provide the necessary information and configure its settings.
Step 1: Provide App Information
- Fill in Required Fields:
- Ensure you fill in all fields marked with a red line, as these are mandatory and cannot be left blank.
- Common required fields include:
Connected App Name: A unique name for your app.
API Name: A unique identifier for the app.
Contact Email: An email address for communication regarding the app.
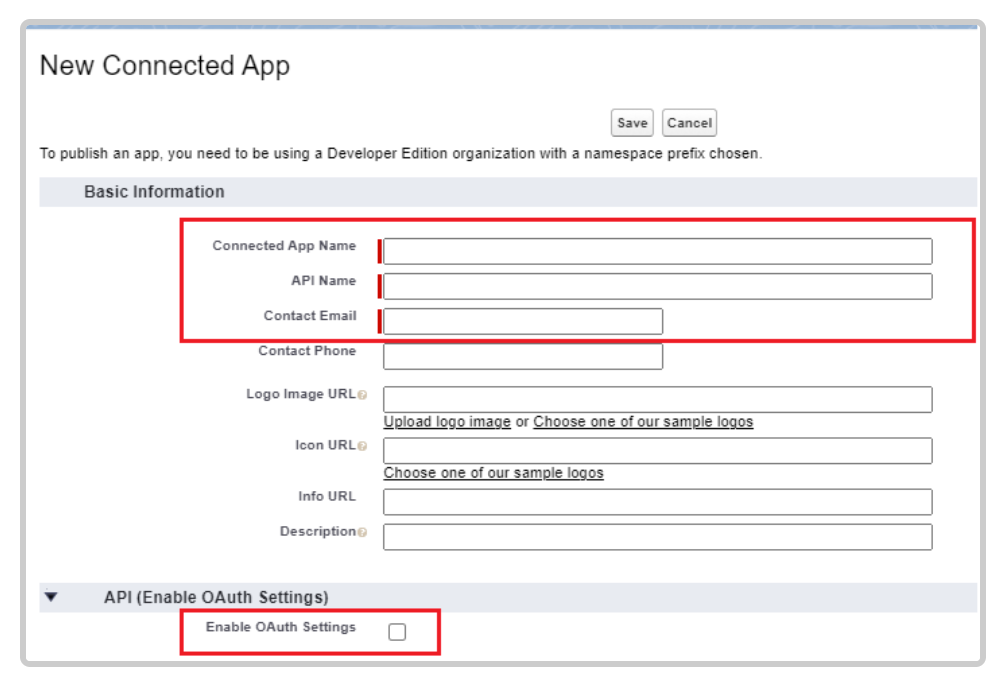
Step 2: Enable OAuth Settings
- Enable OAuth:
- Locate and check the "Enable OAuth Settings" checkbox.
- This action allows you to configure OAuth scopes and permissions for your app.\
- Configure OAuth Scopes:
- Once OAuth is enabled, you can specify the OAuth Scopes that determine the level of access your app will have.
Common scopes include:
1.Access and manage your data (api): Allows API access to your Salesforce data.
2.Perform requests on your behalf at any time (refresh_token): Enables the app to act on behalf of the user without requiring them to log in again.
- Callback URL:
Enter the Callback URL, which is the endpoint where Salesforce will redirect users after they authorize access. This URL is crucial for the OAuth flow.
Step 3: Save Changes
After entering all required information and configuring OAuth settings, click "Save" to finalize your Connected App setup.
You are now ready to continue with further configurations as needed, such as setting up permissions, policies, and integration features. Make sure to review your settings to ensure everything is correctly configured before proceeding.
Updated over 1 year ago