
Delete Data Operation
Delete Data Operation: Google Sheets Connector
The Delete Data Operation in the Google Sheets Connector allows you to automate the deletion of data from a Google Sheets document. This operation deletes entire rows of data based on specific conditions, helping you keep your document clean and organized by removing outdated or unnecessary information.
Important: Deleting data means that whole rows will be deleted from the specified sheet, not just individual cells.
Setting Up the Delete Data Operation
To delete data from a Google Sheets document, follow these steps:
-
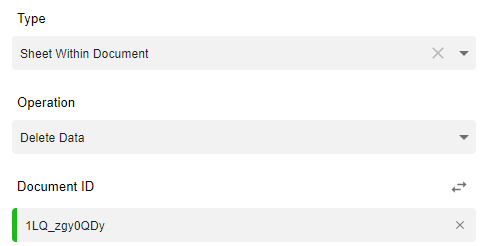
Choose the Delete Data Operation:
- In the Google Sheets Connector, select the Delete Data operation to begin the process of removing data from your sheet.
-
Provide the Document ID:
- Enter the Document ID of the Google Sheets file from which you want to delete data.
- The Document ID is found in the URL of the Google Sheets document. For example, in this URL:
the Document ID is 1LQ_zgy0QDy.https://docs.google.com/spreadsheets/d/1LQ_zgy0QDy/edit
Configuring the Deletion Criteria
To specify which data to delete, you need to configure several parameters:
-
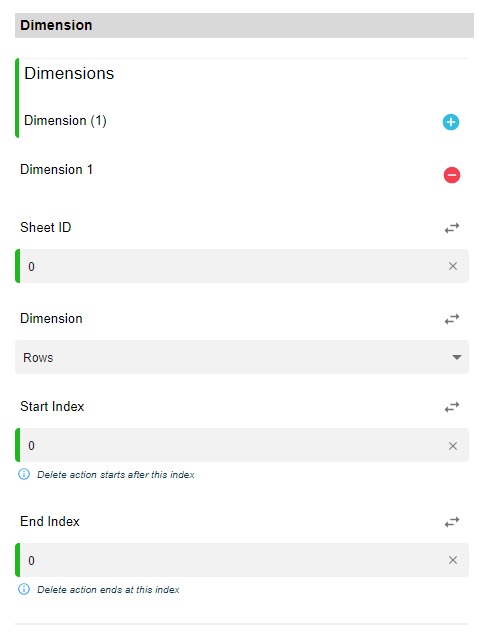
Dimension:
- The Dimension determines the rows or columns that contain the data you wish to delete. You will set this condition based on the rows or columns that should be evaluated for deletion.
- For example, you might choose to delete rows where specific data or conditions are met.
-
Enter the Sheet ID:
- Provide the Sheet ID of the sheet from which you want to delete data.
- To determine the Sheet ID, refer to the Create Sheet Operation where you specified the Sheet ID when creating the sheet.
-
Start Index:
- The Start Index specifies the cell from which the deletion will begin. The index starts at 0, which corresponds to cell A1.
- If you want to start deleting from a specific row or cell, you can enter the corresponding index. For example, an index of 1 would refer to the second row, and an index of 2 would refer to the third row, and so on.
-
End Index:
- The End Index defines the last cell or row to be deleted. This is the index where the deletion will stop.
- For example, if you want to delete rows between row 2 and row 5, you would set the Start Index to 1 (second row) and the End Index to 4 (fifth row).
Example Use Case
Let’s say you have a Google Sheets document tracking customer orders, and you want to delete all data from rows 10 to 15 from the "Orders" sheet.
- Step 1: Provide the Document ID (e.g., 1LQ_zgy0QDy).
- Step 2: Enter the Sheet ID for the "Orders" sheet (e.g., OrdersSheet1).
- Step 3: Specify the Dimension (rows, for instance).
- Step 4: Set the Start Index to 9 (representing the 10th row, since the index starts at 0).
- Step 5: Set the End Index to 14 (representing the 15th row).
When you run the workflow, rows 10 to 15 in the "Orders" sheet will be deleted.
Key Considerations
- Full Row Deletion: This operation deletes entire rows, not just specific cells. Ensure that you specify the correct row range to avoid accidental data loss.
- Flexible Configuration: You can customize which rows or columns to delete based on your workflow’s needs.
- Sheet ID: Make sure to provide the correct Sheet ID as obtained from the Create Sheet Operation to target the right sheet.
The Delete Data Operation in the Google Sheets Connector is a powerful tool for automating the cleanup of your Google Sheets documents, helping you keep data organized and up-to-date. Whether you're removing outdated entries or clearing out temporary data, this operation ensures that your sheets remain relevant and accurate.
Updated over 1 year ago