
Connected App Scopes
When configuring your Connected App, selecting the appropriate OAuth scopes is essential for defining the permissions your app will have within Salesforce. Scopes dictate the commands and access levels available to your application.
Step 1: Choose OAuth Scopes
-
Navigate to the Scopes Menu:
- In the OAuth settings section, locate the scopes menu.
-
Select the Following Scopes: To ensure your app has full access and benefits, check the following three options:
- Full access (full): Grants complete access to all resources and actions in the Salesforce environment.
- Access the identity URL service: Allows access to user identity information, including profile, email, address, and phone.
- Perform requests at any time (refresh_token, offline_access): Enables your app to make requests on behalf of the user without needing them to log in again.
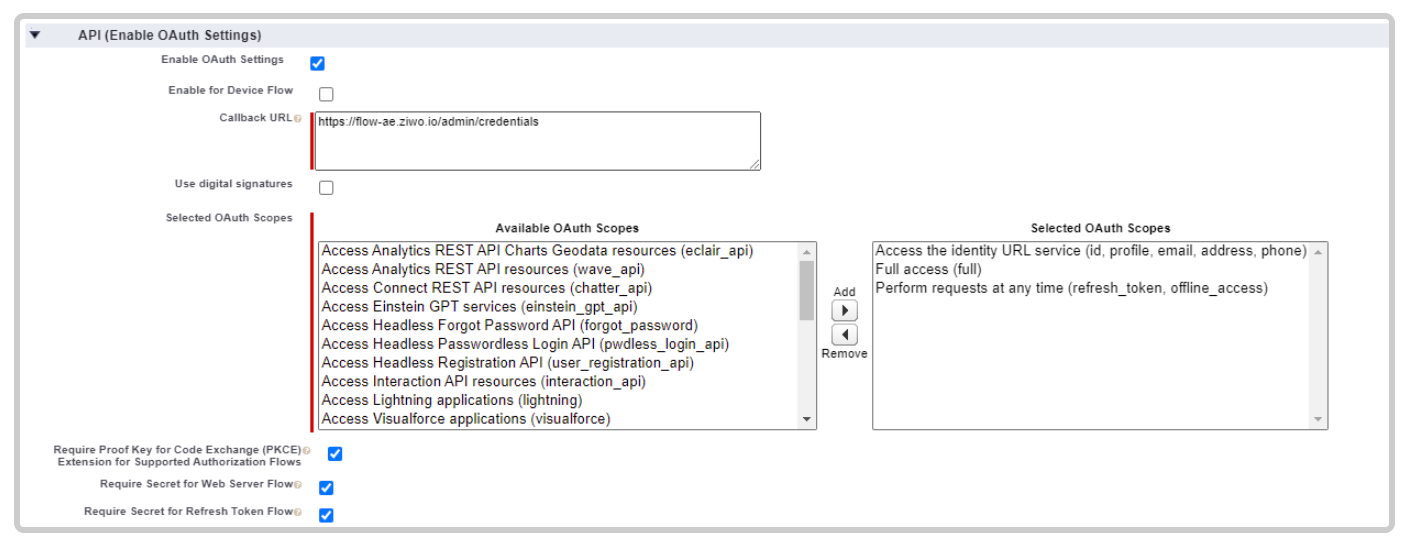
Step 2: Additional Settings
Make sure to check the following options for enhanced security and functionality:
- Require Proof Key for Code Exchange (PKCE) Extension for Supported Authorization Flows: This adds an extra layer of security for authorization.
- Require Secret for Web Server Flow: Ensures that a secret is required for web server-based authentication flows.
- Require Secret for Refresh Token Flow: Mandates the use of a secret for obtaining refresh tokens.
These options can be found directly under the scopes section.
Step 3: Save Your Settings
- Once you have selected the desired scopes and additional settings, scroll down to the bottom of the page or return to the top.
- Click "Save" to apply your changes.
Note: It may take some time for your app settings to be fully processed and ready for use. Be patient as Salesforce updates the configurations. After saving, you can proceed with any further customizations or testing as needed.
Updated over 1 year ago