
Clear Data Operation
Clear Data Operation: Google Sheets Connector
The Clear Data Operation within the Google Sheets Connector allows you to automate the process of clearing data from a Google Sheets document. Unlike the Delete Data Operation, which removes entire rows, the Clear Data Operation only deletes the content within a specified range, leaving the rows or columns intact. This operation is ideal when you need to remove data but keep the structure of your document, such as when clearing out a range of old entries for a new cycle of data.
Setting Up the Clear Data Operation
To clear data from a Google Sheets document, follow these steps:
-
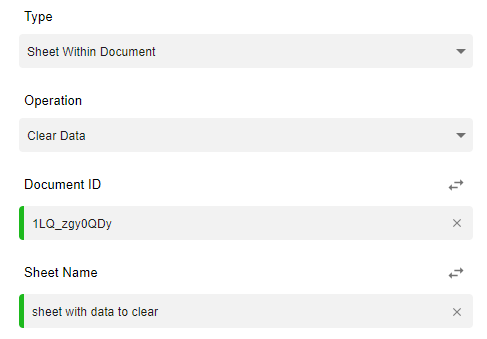
Choose the Clear Data Operation:
- In the Google Sheets Connector, select the Clear Data operation to begin clearing data from your sheet.
-
Provide the Document ID:
- Enter the Document ID of the Google Sheets file from which you want to clear data.
- The Document ID is found in the URL of the Google Sheets document. For example, in the following URL:
the Document ID is 1LQ_zgy0QDy.https://docs.google.com/spreadsheets/d/1LQ_zgy0QDy/edit
-
Specify the Sheet Name:
- Enter the Sheet Name from which you want to clear data.
- To find the Sheet Name, refer to the Create Sheet Operation documentation, where you specified the sheet name when creating the sheet.
Determining the Range of Data to Clear
To specify which data to clear, you need to define the range of cells where the data removal should occur.
-
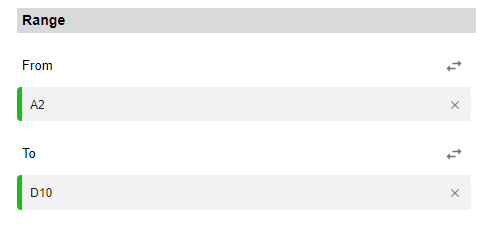
Start and End Range:
- Start Range: Define the first cell where you want the data clearing to begin. For example, if you want to start clearing from cell A1, set the start range to A1.
- End Range: Define the last cell where you want the data clearing to stop. For example, if you want to stop clearing at cell C10, set the end range to C10.
The operation will clear the data in all the cells from the start range to the end range, but the structure of the rows or columns will remain intact.
Example of Range:
- Start Range: A1
- End Range: C10
This will clear all data from cells A1 to C10 but will not remove any rows or columns, only the content.
Example Use Case
Let’s say you have a Google Sheets document where you're tracking weekly sales data, and after each week, you need to clear the data (but keep the structure) for the next set of data.
- Step 1: Provide the Document ID (e.g., 1LQ_zgy0QDy).
- Step 2: Specify the Sheet Name, for example, "Sales Data".
- Step 3: Define the range of cells you want to clear. If you want to clear data from A2 to D20, input this as the range.
- Start Range: A2
- End Range: D20
Running the workflow will clear all data between A2 and D20 in the "Sales Data" sheet, leaving the structure of rows 2 to 20 intact (no rows or columns will be deleted).
Key Considerations
- Data vs Structure: The Clear Data Operation only removes the content (data) from the specified range, while the rows and columns themselves remain in place.
- Flexible Range Definition: You can clear a specific range (e.g., a few cells) or entire columns or rows by setting the appropriate start and end range.
- Sheet Name: Make sure you specify the correct Sheet Name to avoid clearing data in the wrong sheet.
The Clear Data Operation in the Google Sheets Connector is a valuable tool for workflows where you need to clear data but maintain the layout and structure of the document. It’s particularly useful in scenarios like clearing temporary data, preparing templates, or resetting specific ranges for new data entries.
Updated over 1 year ago